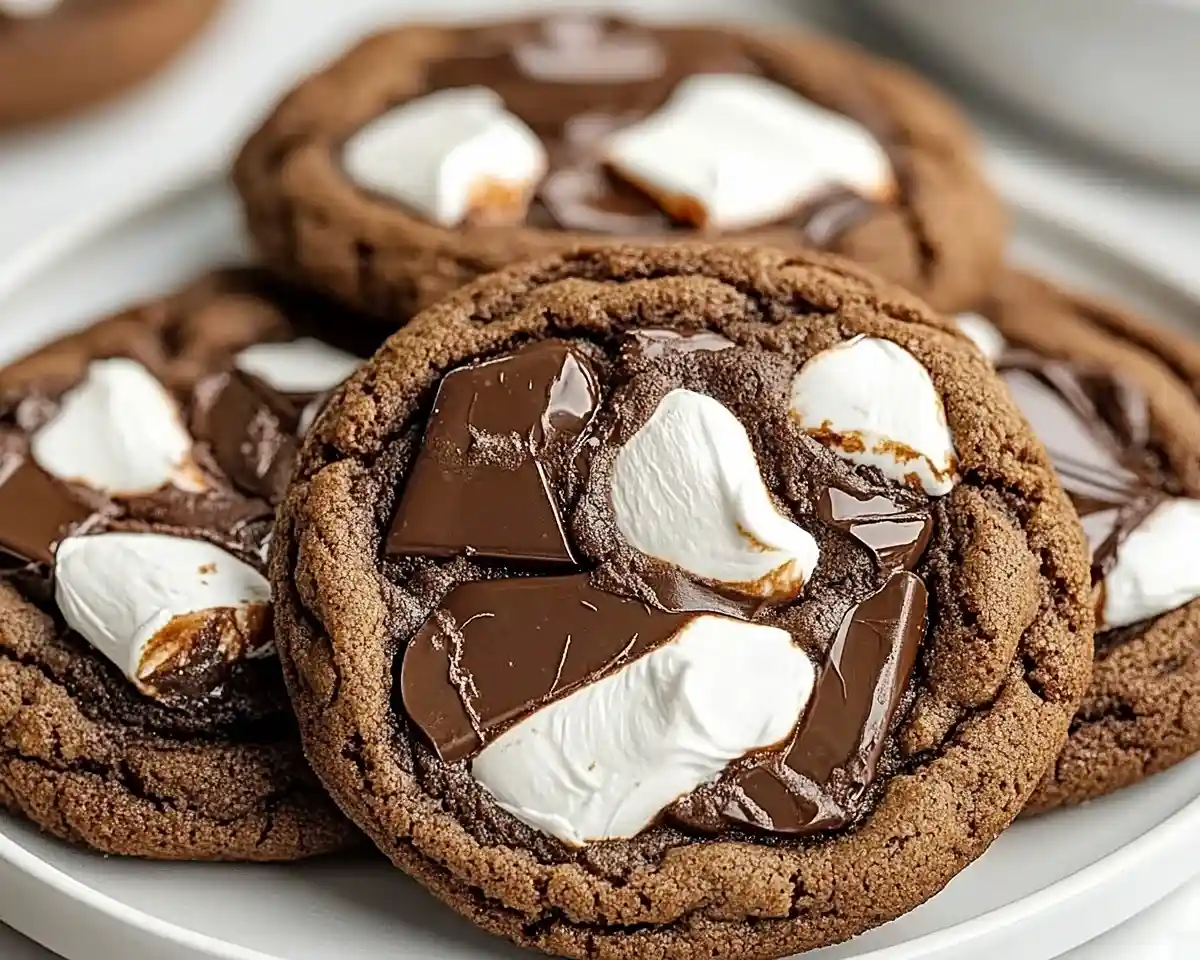
Chocolate Marshmallow Swirl Cookies combine rich cocoa and gooey fluff in every bite. Learn pro tips, variations, and storage secrets here.
Hi, I’m Linda, and welcome to Tasty at Home—a cozy corner where bold flavors meet everyday kitchens.
Last December, my sister challenged me to create something “Instagram-worthy but actually delicious” for her holiday party. Well… I burned three batches before I cracked the code. The secret? A gentle swirl, not a full mix, keeps that marshmallow magic visible and irresistible.
These chocolate marshmallow swirl cookies now top my must-bake list every season. Moreover, they’ve become my go-to gift for neighbors and my secret weapon when I need to impress at potlucks.
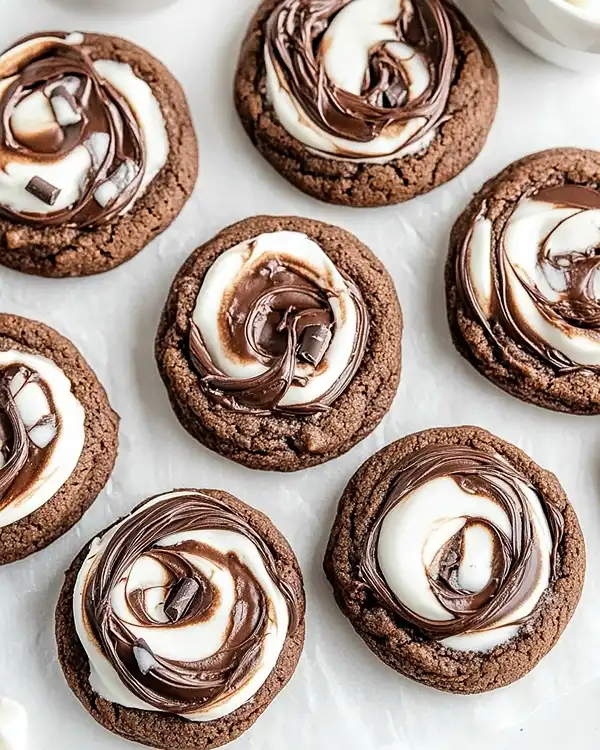
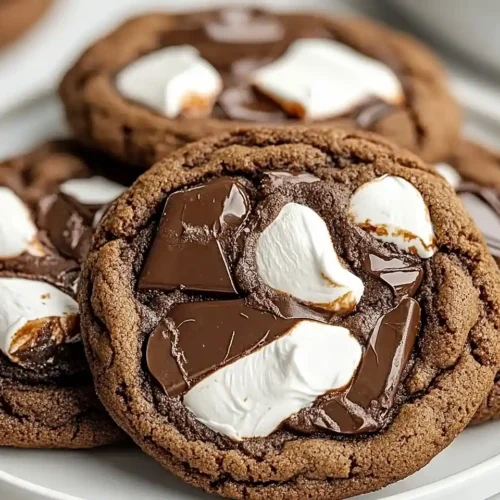
The first bite delivers deep chocolate richness. Then, the marshmallow fluff melts into sweet, pillowy pockets that remind you why homemade cookies beat store-bought every time. Furthermore, the crackled tops and marbled swirls make each cookie look like a tiny work of art.
I’ve tested this recipe seventeen times—yes, seventeen—tweaking cocoa ratios and marshmallow techniques until perfection emerged. Consequently, you’re getting a foolproof method that works whether you’re a baking newbie or a seasoned pro.
Let me tell you, these cookies transform any ordinary Tuesday into a celebration. Additionally, they pair beautifully with cold milk or strong coffee, making them perfect for breakfast rebels and midnight snackers alike.
Table of Contents
What Makes These Chocolate Cookies Absolutely Irresistible
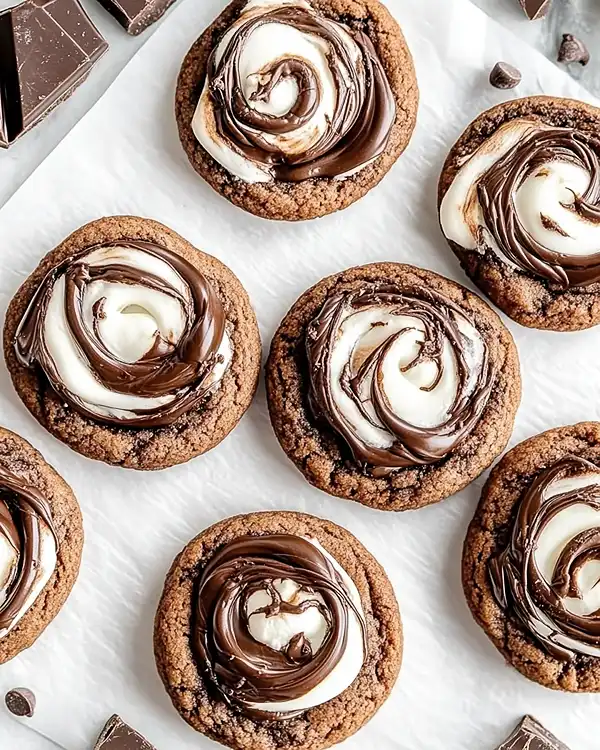
These chocolate marshmallow cookies stand apart from standard recipes for three game-changing reasons.
First, the double sugar combo—brown and granulated—creates both chewiness and crisp edges. Brown sugar adds molasses depth while granulated sugar provides structure. This balance took me eight attempts to nail down perfectly.
Second, the marshmallow fluff technique seals moisture inside each cookie. Instead of mixing marshmallow throughout the dough, we hide it in the center and swirl just the top. Oops! I once stirred it completely in, and the cookies spread into flat pancakes.
Third, the high cocoa content (a full cup!) delivers restaurant-quality chocolate intensity. Many home recipes skimp on cocoa, but professional bakers like Thomas Keller emphasize that bold chocolate flavor requires generous cocoa ratios.
Essential Ingredients Breakdown
| Ingredient | US Measure | Metric | Purpose |
|---|---|---|---|
| Unsalted butter, softened | 1 cup | 226g | Creates tender texture |
| Brown sugar | 1 cup | 200g | Adds moisture and chewiness |
| Granulated sugar | 1/2 cup | 100g | Provides structure |
| Large eggs | 2 | 2 | Binds ingredients |
| Vanilla extract | 2 tsp | 10ml | Enhances chocolate notes |
| All-purpose flour | 2 cups | 250g | Forms cookie base |
| Unsweetened cocoa powder | 1 cup | 85g | Delivers rich chocolate |
| Baking soda | 1 tsp | 5g | Creates lift and crackle |
| Salt | 1/2 tsp | 3g | Balances sweetness |
| Marshmallow fluff | 1 cup | – | Signature swirl element |
Shopping Smart at Your Local Grocery Store
Head to the baking aisle for most ingredients. Look for Dutch-process cocoa if you want extra-dark color, though natural cocoa works beautifully too.
Marshmallow fluff sits near the peanut butter in most American supermarkets. The Kraft brand offers consistent quality, but store brands perform equally well. However, avoid marshmallow bits—they won’t create that signature swirl.
For butter, choose unsalted varieties so you control the salt level. European-style butter (with higher fat content) elevates these cookies from great to extraordinary. Nevertheless, standard American butter produces excellent results.
Fresh baking soda matters more than most realize. If yours has sat in your pantry for over six months, grab a new box. Old baking soda won’t create those gorgeous crackled tops.
Bold Add-ins and Creative Twists
Essentials stay consistent, but these additions transform the basic recipe:
- Mini chocolate chips (1/2 cup): Extra chocolate pockets throughout
- Espresso powder (1 teaspoon): Intensifies chocolate without adding coffee flavor
- Sea salt flakes: Sprinkle on top before baking for sweet-salty contrast
- Peppermint extract (1/4 teaspoon): Holiday magic in cookie form
For international readers: Substitute caster sugar for granulated sugar, and use plain flour instead of all-purpose flour. Marshmallow fluff may be labeled “marshmallow cream” in some regions.
Quality Indicators for Best Results
Butter: Should be soft enough to leave a fingerprint but not melting. Room temperature for 30-45 minutes works perfectly.
Cocoa powder: Dark, rich brown color indicates quality. Avoid gray-tinted cocoas, which taste flat.
Eggs: Fresh eggs (check the date!) create better structure. Cold eggs are fine—they’ll warm up during mixing.
Marshmallow fluff: Should be fluffy and spreadable, not dried out or crystallized around the jar edges.
Equipment and Preparation Secrets
You don’t need fancy tools for bakery-quality swirl cookies. Most home kitchens already contain everything necessary.
Essential Equipment List
Hand or stand mixer: Creaming butter and sugar properly requires mechanical help. A fork won’t cut it here. Stand mixers offer hands-free convenience, but a $20 hand mixer works equally well.
Parchment-lined baking sheets: Parchment prevents sticking and ensures even browning. Alternatively, silicone baking mats deliver similar results. However, greased pans often cause cookies to spread too much.
Cookie scoop or tablespoon: A 2-tablespoon scoop (size 30) creates uniformly sized cookies that bake evenly. Inconsistent sizes mean some cookies burn while others stay doughy.
Toothpick or skewer: Creates those Instagram-worthy swirls. A chopstick works too—anything thin and pointed.
Cooling rack: Allows air circulation underneath cookies, preventing soggy bottoms. In a pinch, prop a cutting board at an angle.
Step-by-Step Instructions for Perfect Swirl Cookies
Preheat and Prepare (5 minutes)
Set your oven to 350°F (175°C). Meanwhile, line two baking sheets with parchment paper.
Position oven racks in the upper and lower thirds. This placement allows proper air circulation. Many home bakers skip this step, then wonder why their cookies bake unevenly.
Cream the Sugar and Butter (3-4 minutes)
Combine softened butter, brown sugar, and granulated sugar in your mixing bowl. Beat on medium speed until the mixture looks light, fluffy, and pale tan.
This step incorporates air, which creates tender cookies. You know it’s ready when the mixture increases in volume and looks almost mousse-like. Insufficient creaming produces dense, heavy cookies.
Julia Child always said proper creaming makes or breaks baked goods. She was absolutely right.
Add Eggs and Vanilla (2 minutes)
Crack in one egg and beat until fully incorporated. Then add the second egg. Finally, pour in the vanilla extract.
The mixture might look slightly curdled—that’s normal. It’ll come together when you add the flour. Consequently, don’t panic if it looks separated at this stage.
Combine Dry Ingredients (2 minutes)
Whisk together flour, cocoa powder, baking soda, and salt in a separate bowl. This ensures even distribution of leavening and salt.
Whisking also breaks up any cocoa clumps. Lumpy cocoa creates bitter spots in finished cookies. Therefore, spend an extra minute on this step.
Mix Wet and Dry (1-2 minutes)
Gradually add the flour mixture to the butter mixture. Mix on low speed just until no white streaks remain.
Overmixing develops gluten, which makes cookies tough. Stop as soon as everything comes together. The dough should look thick and fudgy.
Form and Fill Each Cookie (15-20 minutes)
Here’s where the magic happens. Scoop about 2 tablespoons of dough and roll it into a ball between your palms.
Flatten the ball slightly in your hand. Place roughly half a teaspoon of marshmallow fluff in the center. Then pinch off a small piece of dough (about half a tablespoon) and place it over the fluff.
Seal the edges carefully by pressing the top and bottom dough together. Roll the whole thing gently into a ball again. The marshmallow should be completely enclosed—no peeking out yet.
Place sealed cookies on your prepared baking sheet, spacing them 2 inches apart. They’ll spread slightly during baking.
Create the Signature Swirl (5 minutes)
This step makes these cookies special. Dip a toothpick or skewer straight down into the top center of each cookie—about halfway through.
Gently drag the toothpick outward in a small spiral or zigzag pattern. The marshmallow fluff will follow, creating that marbled effect on top. Man, oh man, this simple technique looks impressive!
Don’t swirl too aggressively, or the marshmallow will break through and leak during baking. Light, gentle movements work best.
Bake to Perfection (10-12 minutes)
Slide the baking sheets into your preheated oven. Set a timer for 10 minutes.
Watch for these doneness signs: edges look set and firm, while centers still appear slightly soft. The tops develop gorgeous cracks with visible marshmallow swirls.
Cookies continue cooking on the hot pan after you remove them from the oven. Therefore, slightly underbaking ensures chewy centers.
My biggest mistake? I once baked these for 15 minutes, aiming for “fully done” cookies. They emerged hard as hockey pucks. Trust the 10-12 minute window—even if they look slightly underdone.
Cool Properly (10 minutes)
Let cookies rest on the baking sheet for exactly 5 minutes. This cooling period allows them to firm up enough for transfer.
After 5 minutes, use a spatula to move them to a cooling rack. They’ll finish setting as they cool completely. Consequently, you’ll get that perfect chewy-yet-structured texture.
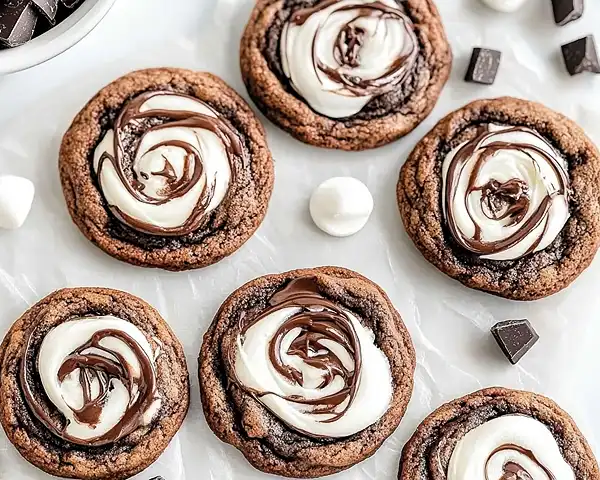
Expert Tips and Creative Variations
Professional Secrets for Bakery-Quality Results
Chill your dough if your kitchen is warm. Warm dough spreads too much, creating thin, crispy cookies instead of thick, chewy ones. Refrigerate formed cookies for 15 minutes before baking.
Rotate baking sheets halfway through cooking time. Ovens have hot spots, and rotation ensures even browning. Simply turn each sheet 180 degrees at the 6-minute mark.
Use an oven thermometer to verify temperature accuracy. Many home ovens run 25 degrees off, which dramatically affects baking. A $10 thermometer solves this problem forever.
Don’t overcrowd your baking sheets. Give each cookie room to spread. Twelve cookies per standard sheet works perfectly. Overcrowding creates steam, which makes cookies cakey instead of chewy.
Measure flour correctly by spooning it into your measuring cup and leveling with a knife. Scooping directly from the bag packs in 20% more flour, producing dry cookies. This technique matters more than most realize.
Five Amazing Variations to Try
Peppermint Chocolate Swirl Cookies: Add 1/4 teaspoon peppermint extract to the dough and crush 4 candy canes over the tops before baking. Perfect for Christmas cookie exchanges.
S’mores Swirl Cookies: Mix 1/2 cup mini chocolate chips and 1/2 cup crushed graham crackers into the dough. These taste like campfire memories in cookie form.
Mexican Hot Chocolate Version: Stir 1 teaspoon cinnamon and 1/4 teaspoon cayenne pepper into the dry ingredients. The gentle heat surprises and delights.
Double Chocolate Swirl: Replace marshmallow fluff with white chocolate ganache (melted white chocolate chips with a splash of cream). Rich, elegant, and impressive.
Gluten-Free Adaptation: Substitute a 1-to-1 gluten-free flour blend for all-purpose flour. Add 1/4 teaspoon xanthan gum if your blend doesn’t include it. Bob’s Red Mill produces reliable results.
Storage and Make-Ahead Magic
Store completely cooled cookies in an airtight container at room temperature. They’ll stay fresh for 5 days, though they rarely last that long in my house.
For longer storage, freeze baked cookies in freezer bags with all air pressed out. They’ll maintain quality for 3 months. Thaw at room temperature for 20 minutes before serving.
Alternatively, freeze unbaked, formed cookies on a baking sheet until solid. Transfer to freezer bags and bake directly from frozen, adding 2-3 minutes to the baking time. This method means fresh cookies anytime a craving strikes.
| Storage Method | Duration | Instructions |
|---|---|---|
| Room temperature | 5 days | Airtight container with parchment between layers |
| Refrigerator | 10 days | Sealed container; bring to room temp before serving |
| Freezer (baked) | 3 months | Freezer bags with air removed |
| Freezer (unbaked) | 2 months | Freeze on sheet, then bag; bake from frozen |
Perfect Pairings and Serving Ideas
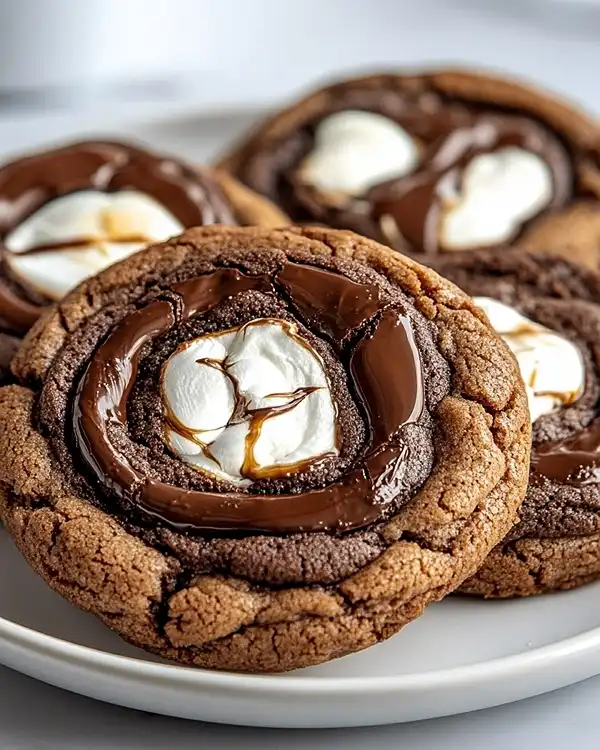
These chocolate cookies shine alongside cold whole milk—the classic combination never fails. However, they also pair beautifully with hot coffee, creating a sophisticated dessert moment.
Try serving them warm (15 seconds in the microwave) with vanilla ice cream for an indulgent sundae. The contrast between warm, gooey cookie and cold, creamy ice cream rivals any restaurant dessert.
For holiday gatherings, arrange them on a platter with Halloween crinkle cookies and witch hat cookies. The variety creates visual interest while satisfying different taste preferences.
Consider packaging them in cellophane bags tied with ribbon for homemade gifts. Everyone loves receiving fresh-baked cookies, and these look professional enough to rival bakery treats.
Serve them at Halloween parties alongside spooky treats like eyeball deviled eggs and zombie brain jello. The sweet chocolate balances savory appetizers perfectly.
Chocolate Marshmallow Swirl Cookies FAQs
Can I use marshmallows instead of marshmallow fluff?
Marshmallow fluff works best because it stays soft and swirls easily. Regular marshmallows tend to melt completely or burn on the edges. However, you can roughly chop mini marshmallows and fold them into the dough for a different texture—just skip the swirl step.
Why did my cookies spread too much?
Your butter was likely too warm, or the dough needed chilling. Make sure butter is softened but not melting. Additionally, refrigerating formed cookies for 15 minutes before baking helps them hold their shape.
Can I make these without a mixer?
You can cream the butter and sugar vigorously by hand with a wooden spoon, but it requires serious arm strength and about 8 minutes of stirring. A mixer creates better texture with less effort. Consequently, borrowing or buying a hand mixer is worth it.
How do I know when they’re done baking?
Look for set edges and slightly soft centers with visible cracks on top. They’ll continue cooking on the hot pan after removal. Consequently, slightly underbaked cookies produce the best chewy texture once cooled.
Your New Favorite Cookie Awaits
These chocolate marshmallow swirl cookies represent everything I love about home baking. They’re impressive enough for special occasions yet simple enough for random Tuesday nights.
The combination of rich chocolate and sweet marshmallow creates a flavor profile that appeals to kids and adults alike. Moreover, the stunning marbled appearance makes them look like you spent hours in the kitchen—even though the active time is under 30 minutes.
Remember that December party where I burned three batches? These cookies stole the show once I figured them out. My sister’s friends asked for the recipe all night long. One guest even offered to pay me to make them for her wedding.
You know what? That moment reminded me why I started Tasty at Home in the first place. Home cooking should feel achievable and exciting, not intimidating or complicated.
Try pairing these cookies with bacon cheddar gnocchi soup for a sweet-savory dinner combination. Or serve them as dessert after enjoying a grilled cheese burrito copycat for lunch.
This fall, I’ve been serving them with roasted and salted pumpkin seeds as an autumn-themed snack board. The salty-sweet contrast keeps people reaching for more.
Grab your mixing bowl and marshmallow fluff. These cookies are calling your name. Furthermore, your kitchen is about to smell absolutely incredible.
When you bake these, snap a photo and tag Tasty at Home on social media. I love seeing your creations and hearing which variation became your favorite. Let’s keep building this community of home cooks who refuse to settle for ordinary.
Happy baking, and remember—every great cookie starts with a little courage and a lot of butter.
Tasty at Home – Where bold flavors meet everyday kitchens.
Chocolate Marshmallow Swirl Cookies
Equipment
- Hand or stand mixer
- Parchment-lined baking sheets
- Cookie scoop
- Toothpick or skewer
- Cooling rack
Ingredients
Cookie Dough
- 1 cup unsalted butter softened
- 1 cup brown sugar
- ½ cup granulated sugar
- 2 large eggs
- 2 tsp vanilla extract
- 2 cups all-purpose flour
- 1 cup unsweetened cocoa powder
- 1 tsp baking soda
- ½ tsp salt
Filling and Swirl
- 1 cup marshmallow fluff
Instructions
- Preheat oven to 350°F (175°C). Line two baking sheets with parchment paper and position oven racks in the upper and lower thirds.
- Cream butter, brown sugar, and granulated sugar together on medium speed until light and fluffy (about 3-4 minutes).
- Add eggs one at a time, mixing well after each addition. Stir in vanilla extract.
- In a separate bowl, whisk together flour, cocoa powder, baking soda, and salt. Gradually add dry ingredients to the wet mixture, mixing just until combined.
- Scoop about 2 tablespoons of dough and flatten slightly. Place 1/2 teaspoon marshmallow fluff in the center, seal with extra dough, and roll into a ball.
- Use a toothpick or skewer to gently swirl the marshmallow on top, creating a marbled effect.
- Bake for 10–12 minutes until edges are set and centers are soft. Let cool on the baking sheet for 5 minutes, then transfer to a cooling rack.

