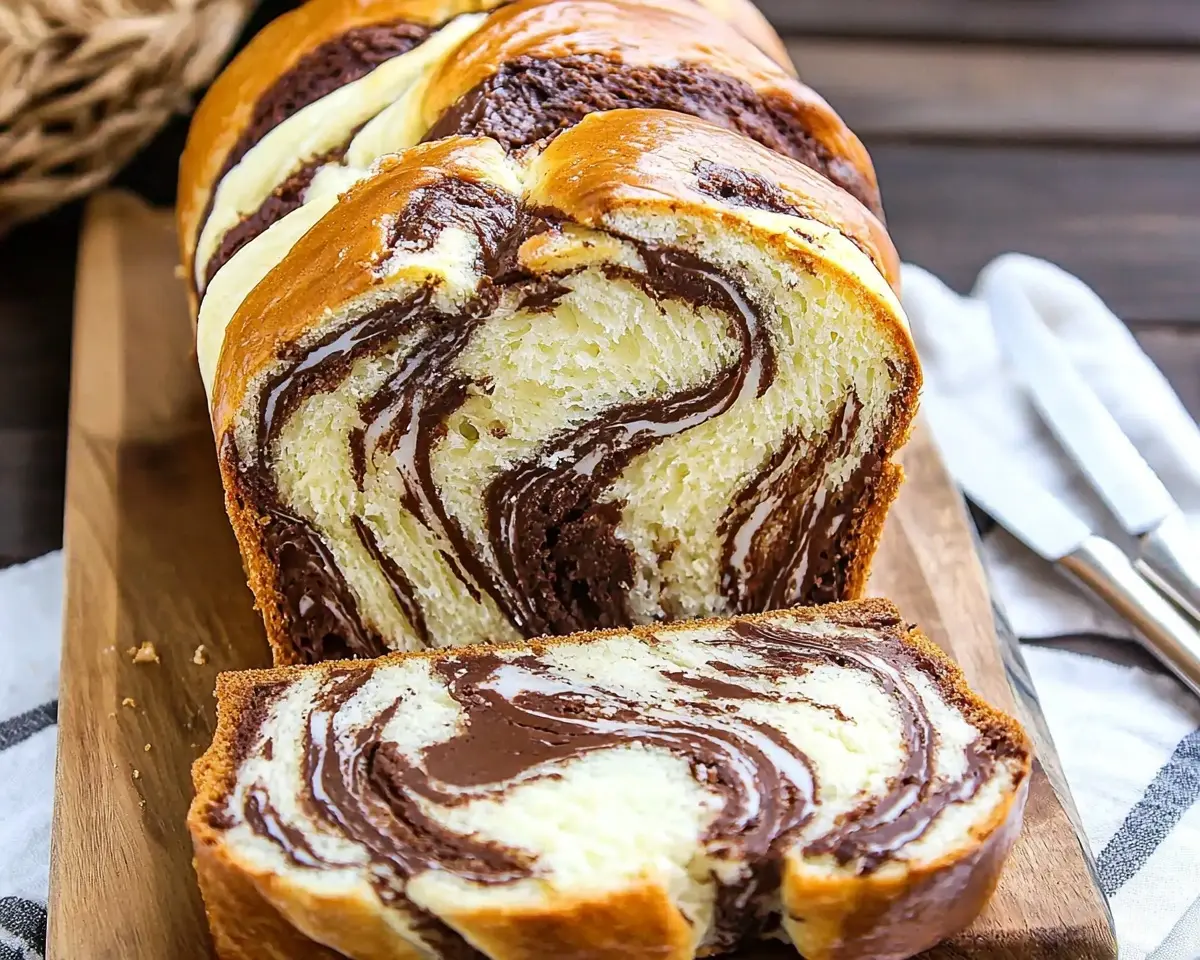
Chocolate Marble Bread recipe with step-by-step guide. Learn professional techniques for perfect marbled loaves every time. Easy homemade sweet bread.
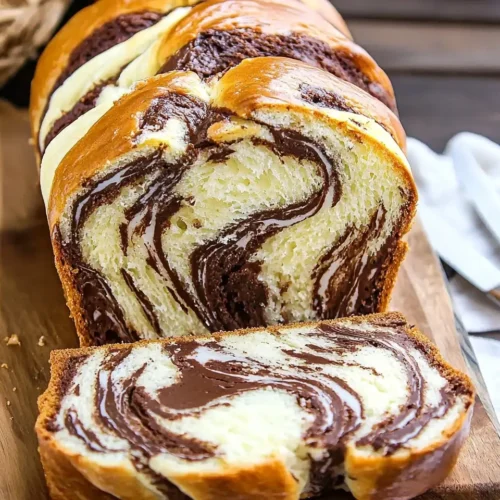
Well, let me tell you about the day I discovered the magic of chocolate marble bread. I’m Linda, and welcome to Tasty at Home—where bold flavors meet everyday kitchens. Picture this: a rainy Saturday morning in Portland, the smell of yeast and cocoa dancing through my kitchen like old friends reuniting. After burning three loaves and questioning my sanity, I finally cracked the code to this stunning sweet marbled bread that looks like edible art.
You know what makes this recipe special? It’s not just another marble cake disguised as bread. This chocolate marble bread combines the tender crumb of enriched dough with the visual drama of chocolate swirls. Moreover, it transforms simple pantry ingredients into something that’ll make your neighbors knock on your door asking for the recipe.
Whether you’re a seasoned baker or someone who’s never worked with yeast, this guide will walk you through every step. After all, I’ve tested this recipe dozens of times—and yes, I’ve made every mistake possible so you don’t have to. Let’s dive into creating these gorgeous loaves that taste as incredible as they look.
Table of Contents
What Makes This Chocolate Marble Bread Recipe Unique
This isn’t your typical sweet marbled bread recipe. Instead of relying on cake batter techniques, we’re building flavor through traditional bread-making methods that create superior texture and longer-lasting freshness. Furthermore, the marbling technique I’ll share creates consistent patterns throughout every slice.
The secret lies in working with two separate doughs—white and chocolate—each developed to complement the other perfectly. Additionally, the enriched dough contains eggs and butter, resulting in a tender crumb that rivals the finest bakery loaves.
Shopping Tips for US Grocery Stores
When shopping for ingredients, focus on quality basics that’ll elevate your final product. Look for organic all-purpose flour in the baking aisle—brands like King Arthur or Bob’s Red Mill deliver consistent results. Meanwhile, active dry yeast should feel fresh when you open the packet; it shouldn’t smell musty or look clumpy.
For chocolate flavor, organic cacao powder provides richer taste than regular cocoa powder. However, standard unsweetened cocoa powder works perfectly if that’s what’s available. Most importantly, ensure your eggs are room temperature before starting—this simple step dramatically improves dough texture.
Essential Ingredients for Perfect Sweet Marbled Bread
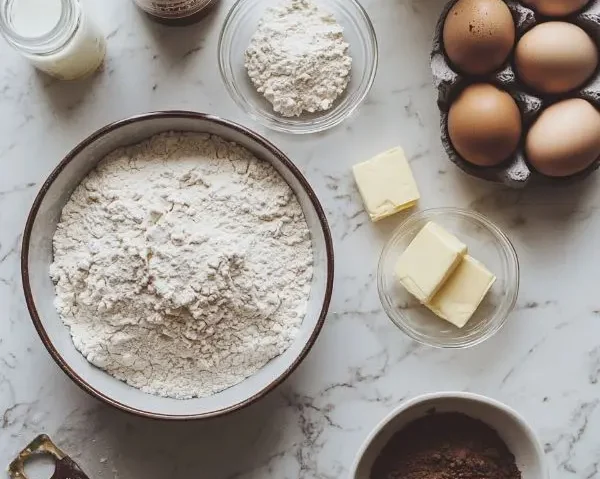
| White Dough Essentials | Amount | Metric |
|---|---|---|
| Lukewarm whole milk | 1 cup | 240ml |
| Sugar (divided) | 1 cup total | 200g |
| Active dry yeast | 2 tsp | 7g |
| Large eggs | 5 | 5 |
| Sea salt | 1/4 tsp | 1.5g |
| Pure vanilla extract | 2 tsp | 10ml |
| All-purpose flour | 6.5 cups | 780g |
| Unsalted butter | 6 oz | 170g |
| Chocolate Additions | Amount | Metric |
|---|---|---|
| Organic cacao powder | 1/4 cup | 25g |
| Ground cinnamon | 1/4 tsp | 1g |
| Egg Wash | Amount | Metric |
|---|---|---|
| Large egg | 1 | 1 |
| Water | 2 tbsp | 30ml |
Bold Add-ins and Creative Variations
Transform your chocolate marble bread with these exciting additions. Try adding 1/2 cup mini chocolate chips to the chocolate dough for extra indulgence. Alternatively, substitute orange zest for cinnamon to create a chocolate-orange variation that’s absolutely divine.
For holiday versions, consider adding 1/4 teaspoon peppermint extract to the white dough during Christmas season. Similarly, espresso powder (1 tablespoon) intensifies the chocolate flavor for coffee lovers.
International Substitutions
Can’t find active dry yeast? Instant yeast works perfectly—just reduce the amount to 1 3/4 teaspoons. Meanwhile, European bakers can substitute strong white bread flour for all-purpose flour, though you may need slightly less liquid.
For metric system users, remember that US cup measurements vary from international standards. Therefore, weighing ingredients ensures consistent results every time.
Essential Equipment and Preparation Steps
Equipment You’ll Need
A stand mixer with dough hook attachment is crucial for developing proper gluten structure. However, if you’re mixing by hand, expect to knead each dough portion for 8-10 minutes until smooth and elastic.
You’ll also need two large mixing bowls for rising, plus measuring cups, a kitchen scale (highly recommended), and two 9×5-inch loaf pans or baking sheets. Additionally, parchment paper and plastic wrap are essential for the rising process.
Professional Preparation Technique
Start by organizing your workspace—this recipe involves multiple steps and timing matters. First, bring eggs and butter to room temperature (about 2 hours at room temperature). Then, warm your milk to lukewarm—it should feel barely warm when tested on your wrist.
Step-by-Step Instructions for Perfect Results
Activating the Yeast Foundation
Begin by combining lukewarm milk, 1/4 cup sugar, and yeast in a small bowl. Stir gently until sugar dissolves completely. Next, place the mixture in a warm spot for 5-10 minutes until foamy and doubled in volume.
Man, oh man, this step is crucial—if your yeast doesn’t activate, your dough won’t rise properly. The mixture should smell pleasantly yeasty and look bubbly. If it doesn’t foam, your yeast might be expired or your milk too hot.
Creating the Enriched Dough Base
Using your stand mixer with paddle attachment, beat the remaining eggs and 3/4 cup sugar on high speed for exactly 5 minutes. This creates the foundation for our tender crumb structure. The mixture should become pale and slightly thickened.
Now, reduce mixer speed to low and slowly add the activated yeast mixture, sea salt, and vanilla extract. Mix until just combined—overmixing at this stage can develop gluten prematurely.
Incorporating Flour and Butter
Switch to the dough hook attachment for this critical phase. Add sifted flour 1/2 cup at a time, starting with 4 cups total. Once flour is incorporated, add softened butter pieces gradually.
Here’s where I learned from experience—the dough will look messy and sticky initially. Don’t panic! This enriched dough needs time to develop structure. Keep mixing until butter is completely absorbed, about 3-4 minutes.
Dividing for Marble Magic
Using a silicone spatula, carefully divide the sticky dough into two equal portions. Transfer half to a medium bowl and set aside—this becomes your chocolate dough. Meanwhile, continue working with the remaining portion in your mixer.
Add the remaining 1.5 cups flour to the mixer bowl, 1/2 cup at a time. The white dough is ready when it pulls away from bowl sides and feels soft yet elastic. Transfer to an oiled bowl, cover with plastic wrap, and place in a warm area.
Developing the Chocolate Dough
Return the reserved dough to your mixer bowl. Add cacao powder and ground cinnamon, then mix on low speed. Gradually add 1 cup additional flour, 1/2 cup at a time, until the dough stops sticking to bowl sides.
The chocolate dough should match the white dough’s consistency—stretchy and smooth without being sticky. Transfer to another oiled bowl, cover, and let both doughs rise for 1 to 1.5 hours until doubled.
Creating the Marble Pattern
Once doubled, work with one color at a time on a floured surface. Divide each dough portion in half (remember, this recipe yields 2 loaves). Keep unused portions covered to prevent drying.
Roll white dough into a rectangle about 1/4-inch thick. Repeat with chocolate dough, aiming for similar dimensions. Place chocolate rectangle directly on top of white dough—don’t worry about perfect alignment.
Advanced Marbling Technique
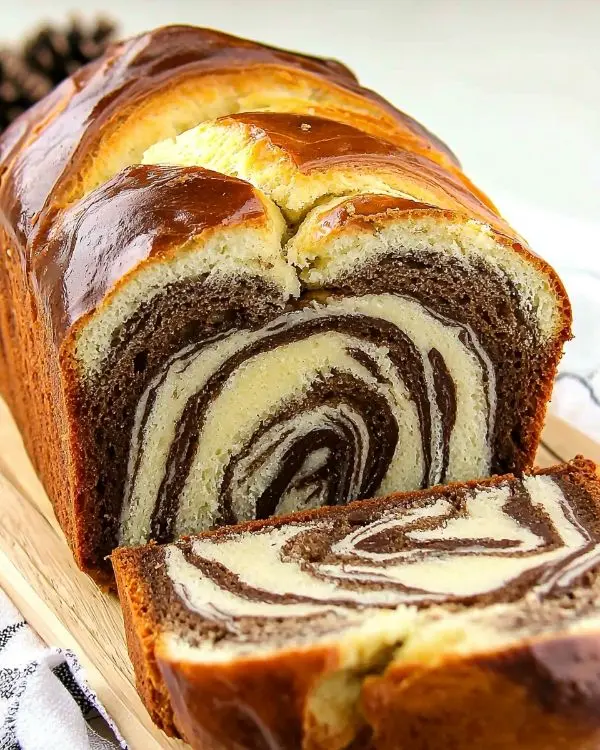
Here’s the secret that took me months to perfect: fold the layered dough into four vertical sections, then roll out again to 1/2-inch thickness. This creates initial marbling patterns throughout the dough.
Next, fold the elongated rectangle in half and roll out one final time to 1-inch thickness. This double-folding technique ensures beautiful marble patterns in every slice.
Braiding for Visual Impact
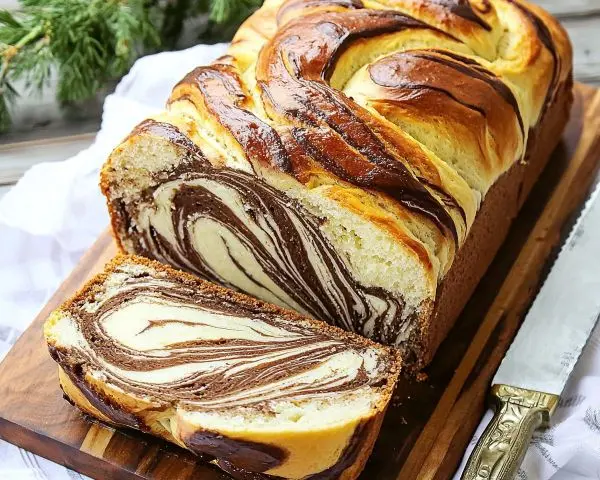
Make three cuts lengthwise through your marble dough rectangle, leaving the top connected. You now have three strips attached at one end. Braid these strips loosely, tucking the bottom ends under the finished loaf.
As you braid, gently twist each strip to reveal more marble patterns. Don’t worry about perfection—rustic charm makes homemade bread special. Place each braided loaf in a buttered, parchment-lined pan.
Final Proofing and Egg Wash
Allow braided loaves to proof in a warm place for 45 minutes until puffy and increased in size. During the last 15 minutes of proofing, preheat your oven to 350°F (180°C).
Beat one egg with 2 tablespoons water for your egg wash. Just before baking, brush each loaf generously with egg wash—this creates that gorgeous golden crust we’re after.
Baking to Perfection
Bake for 40-45 minutes until deep golden brown. Test doneness by inserting a long toothpick into the thickest part—it should come out clean or with just a few moist crumbs attached.
Let me tell you, the aroma during baking is absolutely intoxicating. Your kitchen will smell like a French patisserie, and your family will start gathering hopefully around the oven.
Expert Tips for Bakery-Quality Chocolate Marble Bread Results
Temperature Control Secrets
Yeast is finicky about temperature—too hot kills it, too cold leaves it dormant. When I started baking professionally, Thomas Keller taught me that perfect yeast temperature feels neutral on your wrist. Additionally, your rising environment should be consistently warm but not hot.
Create an ideal proofing environment by placing dough in an oven with just the light on. Alternatively, place bowls on top of your refrigerator, where gentle warmth helps consistent rising.
Timing and Texture Indicators
Watch for visual cues rather than relying solely on time. Properly risen dough should double in size and spring back slowly when gently poked. Furthermore, well-developed dough should feel smooth and elastic, not sticky or tearing easily.
My Biggest Mistake (And How to Avoid It)
Oops! Early in my baking journey, I rushed the rising process by cranking up heat. This created uneven texture and yeasty flavor. Instead, patience rewards you with superior flavor development and tender crumb structure.
Always allow full rising time—this develops flavor complexity that rushed dough never achieves. Moreover, properly risen dough bakes more evenly and maintains freshness longer.
Creative Variations and Serving Suggestions
Holiday and Seasonal Adaptations
Transform this chocolate marble bread for special occasions with simple additions. During autumn, add 1/2 teaspoon pumpkin pie spice to the white dough for seasonal warmth. Meanwhile, holiday versions benefit from 1/4 teaspoon almond extract and dried cranberries.
For Valentine’s Day, incorporate 2 tablespoons strawberry powder into the white dough, creating pink and chocolate swirls. Similarly, Saint Patrick’s Day calls for green food coloring in the white portion—kids absolutely love this festive twist.
Regional American Variations
Southern-style chocolate marble bread incorporates 1/2 cup buttermilk (reduce regular milk accordingly) for tangy depth. Additionally, Texas bakers often add 1/4 cup strong coffee to intensify chocolate flavor.
New England variations include 1/2 cup chopped walnuts or pecans mixed into the chocolate dough. These nuts complement the chocolate beautifully while adding textural interest to each slice.
Dietary Modifications
Creating dairy-free versions requires careful substitution. Replace milk with unsweetened almond milk and butter with vegan butter substitute. However, maintain the same temperatures and mixing techniques for consistent results.
For reduced sugar versions, substitute 1/2 cup of the sugar with unsweetened applesauce. This maintains moisture while reducing overall sweetness—though rising times may extend slightly.
Storage and Make-Ahead Strategies
| Storage Method | Duration | Quality Notes |
|---|---|---|
| Room temperature (wrapped) | 3-4 days | Best texture and flavor |
| Refrigerated (wrapped) | 1 week | Slice and toast for best results |
| Frozen (whole loaf) | 3 months | Thaw completely before serving |
| Frozen (sliced) | 3 months | Toast directly from frozen |
Make-Ahead Professional Chocolate Marble Bread Tips
Prepare dough through the first rise, then refrigerate overnight for enhanced flavor development. Cold fermentation creates complex tastes that same-day baking can’t achieve. Moreover, the slower rise produces more tender crumb structure.
For busy schedules, complete loaves freeze beautifully. Wrap cooled bread tightly in plastic wrap, then aluminum foil. When ready to serve, thaw at room temperature for 2-3 hours.
Freshness Preservation Secrets
Store completely cooled loaves in airtight containers or zip-lock bags. Adding a slice of white bread to the container helps maintain moisture levels naturally. Additionally, avoid refrigerating unless necessary—cold temperatures actually accelerate staleness.
For optimal slicing, use a sharp serrated knife with gentle sawing motions. Clean the blade between cuts to maintain neat marble patterns in each slice.
Perfect Pairings and Serving Ideas
This chocolate marble bread shines alongside morning coffee or afternoon tea. The subtle sweetness complements both bold espresso and delicate Earl Grey perfectly. Furthermore, thick slices make exceptional French toast for weekend brunches.
Try serving with homemade apple crisp for a dessert that celebrates American comfort food traditions. Similarly, pair with strawberry pound cake for an elegant spring dessert buffet.
For casual entertaining, this bread transforms into sophisticated tea sandwiches. Spread with cream cheese and thin cucumber slices for refined afternoon gatherings. Additionally, toasted slices with butter make perfect companions to old-fashioned apple crisp.
Create memorable holiday presentations by serving alongside Christmas cherry bars for festive color contrast. Meanwhile, summer picnics benefit from pairing with healthy street corn pasta salad for textural variety.
Chocolate Marble Bread FAQs
How do you create a marble effect with chocolate?
The marble effect happens through layering and folding techniques. Roll white and chocolate doughs into rectangles, stack them, then fold and roll repeatedly. This creates natural swirling patterns that distribute throughout the bread during baking.
What is the origin of chocolate marble cake?
Marble cakes originated in 19th-century America when bakers combined vanilla and chocolate batters in single pans. The technique evolved from German immigrants who brought marbled baking traditions, eventually becoming an American bakery staple by the 1900s.
What are the ingredients in Starbucks marble loaf cake?
Starbucks marble loaf typically contains flour, sugar, eggs, butter, vanilla, and cocoa powder similar to homemade versions. However, commercial versions include preservatives and stabilizers that home bakers don’t need when making fresh loaves.
What’s the tastiest bread in the world?
Taste preferences vary globally, but enriched breads like challah, brioche, and this chocolate marble bread rank among favorites. The combination of eggs, butter, and sugar creates universal appeal that transcends cultural boundaries and satisfies diverse palates.
Final Thoughts: Your Chocolate Marble Bread Journey
Creating perfect chocolate marble bread requires patience, technique, and willingness to embrace imperfection. Remember that each loaf tells its own story through unique marble patterns—no two are exactly alike, and that’s the beauty of homemade baking.
As autumn approaches, imagine serving warm slices with hot cider while leaves fall outside your kitchen window. This bread connects us to seasonal rhythms and creates memories that store-bought alternatives simply cannot match.
Now grab your mixing bowls and start creating your own chocolate marble bread masterpiece. Don’t forget to share photos of your gorgeous loaves on social media—I’d love to see how your marble patterns turned out! Tag us @TastyAtHome because every successful bake deserves celebration.
Whether you’re preparing for Halloween pumpkin spice cookies season or planning ahead for holiday gatherings, this chocolate marble bread will become your signature contribution to every table.
Chocolate Marble Bread
Equipment
- Stand mixer with dough hook
- Large mixing bowls
- Kitchen scale
- 9×5-inch loaf pans
- measuring cups
- Parchment paper
- Plastic wrap
Ingredients
White Dough
- 1 cup lukewarm whole milk 240ml
- 1 cup sugar 200g, divided
- 2 tsp active dry yeast 7g
- 5 large eggs room temperature
- ¼ tsp sea salt 1.5g
- 2 tsp pure vanilla extract 10ml
- 6.5 cups all-purpose flour 780g
- 6 oz unsalted butter 170g, softened
Chocolate Additions
- ¼ cup organic cacao powder 25g
- ¼ tsp ground cinnamon 1g
Egg Wash
- 1 large egg
- 2 tbsp water 30ml
Instructions
- Combine lukewarm milk, 1/4 cup sugar, and yeast in a small bowl. Stir gently until sugar dissolves completely. Place in a warm spot for 5-10 minutes until foamy and doubled in volume.
- Using stand mixer with paddle attachment, beat remaining eggs and 3/4 cup sugar on high speed for 5 minutes until pale and slightly thickened.
- Reduce mixer speed to low and slowly add activated yeast mixture, sea salt, and vanilla extract. Mix until just combined.
- Switch to dough hook attachment. Add sifted flour 1/2 cup at a time, starting with 4 cups total. Add softened butter pieces gradually and mix until butter is completely absorbed, about 3-4 minutes.
- Divide dough into two equal portions. Set half aside for chocolate dough. Add remaining 1.5 cups flour to mixer bowl, 1/2 cup at a time, until dough pulls away from bowl sides. Transfer to oiled bowl, cover with plastic wrap.
- Return reserved dough to mixer. Add cacao powder and cinnamon, mix on low speed. Gradually add 1 cup flour until dough stops sticking to bowl sides. Transfer to another oiled bowl, cover.
- Let both doughs rise for 1 to 1.5 hours until doubled in size.
- Divide each dough portion in half. Roll white dough into 1/4-inch thick rectangle. Roll chocolate dough to similar dimensions and place on top of white dough.
- Fold layered dough into four vertical sections, then roll out again to 1/2-inch thickness. Fold in half and roll out one final time to 1-inch thickness.
- Make three cuts lengthwise through marble dough rectangle, leaving top connected. Braid the three strips loosely, gently twisting each strip to reveal marble patterns. Place in buttered, parchment-lined pans.
- Allow braided loaves to proof for 45 minutes until puffy. Preheat oven to 350°F (180°C) during last 15 minutes.
- Beat egg with 2 tablespoons water for egg wash. Brush each loaf generously with egg wash before baking.
- Bake for 40-45 minutes until deep golden brown. Test doneness with a toothpick inserted into thickest part – it should come out clean or with just a few moist crumbs.

