Chocolate Chip Cookie Brownies Recipe: combining fudgy brownies with chewy cookie dough. Simple steps, expert tips, and amazing flavor in every bite.
Last summer, I faced a dessert emergency. My nephew wanted brownies. My daughter demanded cookies. Well… I combined them, and honestly? Best kitchen accident ever.
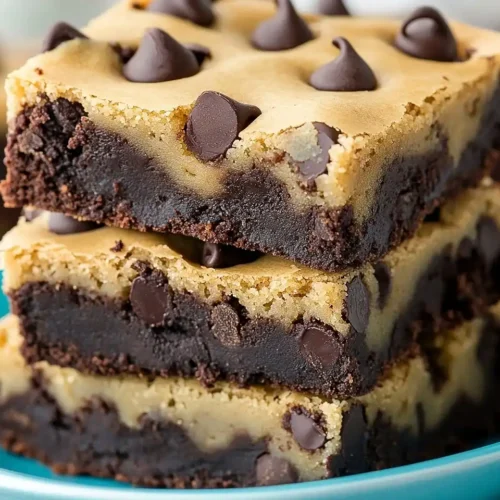
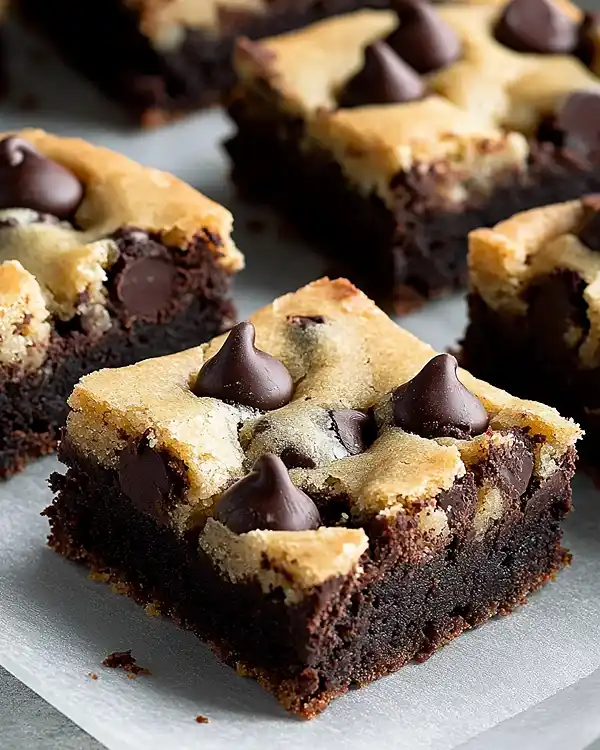
These chocolate chip cookie brownies—or “brookies” as they’re lovingly called—deliver pure magic in every square. The fudgy brownie base meets chewy cookie dough top in perfect harmony. You know that moment when chocolate melts on your tongue and everything feels right? That’s this dessert.
I’ve tested this recipe seventeen times (yes, really) to nail the perfect ratio. The result? A crowd-pleasing treat that works for holidays, potlucks, or Tuesday afternoons when you need something extraordinary.
Tasty at Home – Where bold flavors meet everyday kitchens.
Table of Contents
What Makes These Brookies Absolutely Irresistible
This brownie and cookie recipe solves the age-old debate: you don’t have to choose anymore. The technique creates distinct layers that bake together seamlessly, ensuring neither element overpowers the other.
The secret lies in texture contrast. Fudgy cocoa-rich brownies provide depth while semi-sweet chocolate chips in cookie dough add sweetness and crunch. According to pastry techniques emphasized by renowned baker Alice Medrich, controlling moisture levels in each component ensures perfect results.
Essential Ingredients: Quality Matters
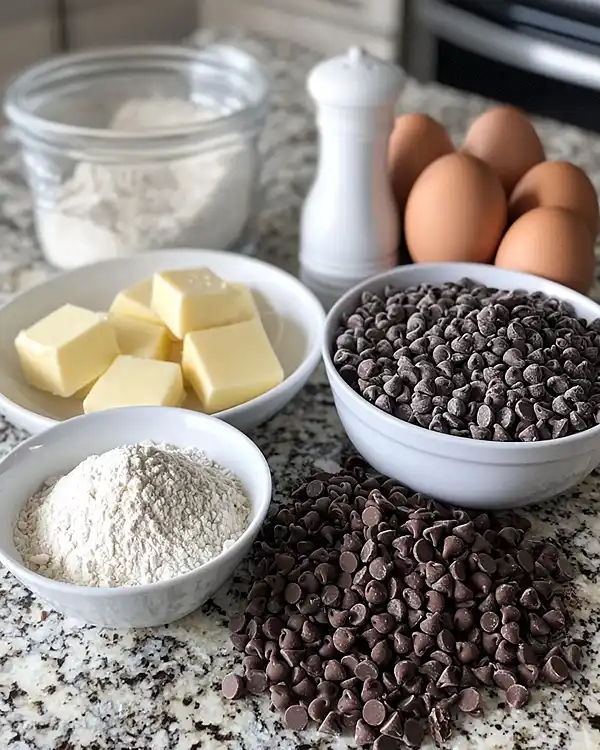
Start with European-style butter for richer flavor—the higher fat content makes all the difference. Choose Dutch-process cocoa powder for deeper chocolate notes in your brownie base. For chocolate chips, select semi-sweet varieties with at least 60% cacao content.
Fresh eggs at room temperature incorporate more smoothly into both batters. Real vanilla extract (never imitation) elevates the entire flavor profile. These quality choices transform a good dessert into an unforgettable one.

Chocolate Chip Cookie Brownies (Brookies)
Equipment
- 8×8 inch baking dish
- Parchment paper
- mixing bowls
- hand mixer
- Measuring cups and spoons
- Rubber spatula
- wire rack
Ingredients
Brownie Layer
- ½ cup unsalted butter melted
- 1 cup granulated sugar
- 2 large eggs room temperature
- 1 tsp vanilla extract pure, not imitation
- ⅓ cup cocoa powder Dutch-process preferred
- ½ cup all-purpose flour sifted
- ¼ tsp salt fine sea salt
Cookie Layer
- ½ cup unsalted butter softened
- ½ cup granulated sugar
- ½ cup brown sugar packed
- 1 large egg room temperature
- 1 tsp vanilla extract
- 1 ¼ cups all-purpose flour
- ½ tsp baking soda fresh for best rise
- ½ tsp salt
- 1 cup chocolate chips semi-sweet
Instructions
- Preheat oven to 350°F (175°C). Line an 8×8-inch baking dish with parchment paper, leaving overhang for easy lifting.
- In a bowl, melt butter and whisk in sugar until dissolved. Add eggs and vanilla extract, mixing until glossy.
- Sift cocoa powder, flour, and salt together. Fold into wet ingredients until just combined to form brownie batter.
- In a separate bowl, cream butter and both sugars for 2–3 minutes. Beat in egg and vanilla.
- Combine flour, baking soda, and salt. Add to wet ingredients in two parts, stirring gently. Fold in chocolate chips.
- Spread brownie batter in pan. Drop spoonfuls of cookie dough on top and gently press or swirl for marbled effect.
- Bake 30–35 minutes until edges are set but the center is slightly soft. A toothpick should come out with moist crumbs.
- Cool completely in pan for 2 hours before lifting out and cutting into squares.
Notes
Complete Ingredient List

| Ingredient | US Measurement | Metric | Notes |
|---|---|---|---|
| Brownie Layer | |||
| Unsalted butter | 1/2 cup | 113g | Melted |
| Granulated sugar | 1 cup | 200g | |
| Large eggs | 2 | 2 | Room temperature |
| Vanilla extract | 1 tsp | 5ml | Pure, not imitation |
| Cocoa powder | 1/3 cup | 30g | Dutch-process preferred |
| All-purpose flour | 1/2 cup | 60g | Sifted |
| Salt | 1/4 tsp | 1.5g | Fine sea salt |
| Cookie Layer | |||
| Unsalted butter | 1/2 cup | 113g | Softened |
| Granulated sugar | 1/2 cup | 100g | |
| Brown sugar | 1/2 cup | 110g | Packed |
| Large egg | 1 | 1 | Room temperature |
| Vanilla extract | 1 tsp | 5ml | |
| All-purpose flour | 1 1/4 cups | 150g | |
| Baking soda | 1/2 tsp | 2.5g | Fresh for best rise |
| Salt | 1/2 tsp | 3g | |
| Chocolate chips | 1 cup | 170g | Semi-sweet |
Smart Shopping Tips
Find Dutch-process cocoa in the baking aisle at Whole Foods or Trader Joe’s. Target and Walmart carry quality chocolate chips—look for Ghirardelli or Guittard brands. Grab unsalted butter from the dairy section; salted butter throws off the delicate balance.
For international readers: substitute caster sugar for granulated, and plain flour works perfectly for all-purpose flour. Convert measurements using standard kitchen scales for accuracy.
Essential Equipment and Preparation
You’ll need an 8×8-inch baking dish for perfect thickness. Glass or metal works fine—metal browns edges slightly more. Parchment paper prevents sticking and allows easy removal. Two mixing bowls keep batters separate until assembly.
A hand mixer speeds cookie dough preparation, though a wooden spoon works with extra arm power. Measuring cups and spoons ensure precision. One rubber spatula handles folding and spreading duties efficiently.
Step-by-Step Instructions
Step 1: Prepare Your Workspace
Preheat your oven to 350°F (175°C) and position the rack in the center. Line your 8×8-inch baking dish with parchment paper, leaving overhang on two sides for lifting. This simple trick saves frustration later when removing cooled brookies.
Step 2: Create the Brownie Base
Melt butter in a microwave-safe bowl in 30-second intervals, stirring between each. Add granulated sugar immediately while butter’s still warm—this helps dissolve the sugar crystals. Whisk in eggs one at a time, followed by vanilla extract, until the mixture looks glossy and slightly thickened.
Oops! I once added cold eggs straight from the fridge, and they seized up the melted butter into lumps. Always bring eggs to room temperature first—it takes just 15 minutes in warm water.
Step 3: Mix Dry Brownie Ingredients
Sift cocoa powder, flour, and salt together to eliminate lumps. Fold these dry ingredients into your wet mixture using gentle strokes—overmixing develops gluten and creates tough brownies. Stop when you see no more flour streaks, even if tiny cocoa specks remain.
The batter should flow like thick honey when you lift the spatula. This consistency ensures fudgy centers after baking.
Step 4: Build the Cookie Dough
Cream softened butter with both sugars using a hand mixer on medium speed for 2-3 minutes. The mixture turns pale yellow and fluffy—this incorporates air for lighter texture. Beat in the egg and vanilla until fully combined and slightly increased in volume.
As Julia Child always emphasized, proper creaming creates structure in cookies. Don’t rush this step.
Step 5: Finish Cookie Dough
Mix flour, baking soda, and salt in a separate small bowl. Add these dry ingredients to your butter mixture in two additions, stirring just until combined between each. Overmixing makes dense, tough cookies rather than tender ones.
Fold in chocolate chips with a spatula until evenly distributed. The dough should be soft but hold its shape when scooped.
Step 6: Layer and Marble
Pour brownie batter into your prepared pan, spreading evenly to all corners with a spatula. Drop spoonfuls of cookie dough across the entire brownie surface—I use about 12-15 dollops for good coverage. Use your fingers or the back of a spoon to gently press cookie dough into the brownie layer, leaving some peaks exposed.
For a marbled effect, swirl a butter knife through both layers once or twice. Don’t overdo it—you want distinct layers, not a muddy mixture.
Step 7: Bake to Perfection
Bake for 30-35 minutes until edges look set and pull slightly from pan sides. The center should still jiggle just a bit when you shake the pan—this ensures gooey brookies, not dry ones. A toothpick inserted in the center comes out with moist crumbs, never completely clean.
Check at 28 minutes if your oven runs hot. Dark pans may require reduced baking time.
Step 8: Cool and Slice
Let brookies cool completely in the pan on a wire rack—this takes about 2 hours. Man, oh man, cutting them warm creates messy squares that fall apart. Patience pays off here.
Use the parchment overhang to lift the entire block onto a cutting board. Wipe your knife clean between cuts for neat edges. Cut into 9 or 16 squares depending on desired portion size.

Expert Tips for Phenomenal Results
Room temperature ingredients blend more smoothly and create better texture. Take butter and eggs out 30-60 minutes before starting. This professional technique makes a noticeable difference in the final product.
Don’t overbake—underdone is better than overdone for brookies. They continue cooking slightly as they cool. The center should look just barely set when you remove the pan from the oven.
Use high-quality chocolate in both layers. Cheap chocolate contains less cocoa butter and more fillers, resulting in waxy taste and poor melting. Invest in brands like Guittard, Ghirardelli, or Callebaut for remarkable flavor improvement.
Creative Variations Worth Trying
Mint Chocolate Version: Add 1/2 teaspoon peppermint extract to the brownie batter and use dark chocolate chips in the cookie layer. Top with crushed candy canes for holiday appeal.
Peanut Butter Swirl: Warm 1/2 cup peanut butter until pourable, drizzle over cookie dough layer before baking, then swirl with a knife. The combination tastes like a Reese’s cup in bar form.
Triple Chocolate Luxury: Replace half the all-purpose flour in cookie dough with cocoa powder and add white chocolate chips alongside semi-sweet ones. Chocolate lovers go absolutely wild for this intense variation.
Salted Caramel Upgrade: Drizzle 1/3 cup caramel sauce over brownie layer before adding cookie dough, then sprinkle flaky sea salt on top before baking. The sweet-salty contrast creates sophisticated depth.
Espresso Enhancement: Add 1 tablespoon instant espresso powder to brownie batter for deeper chocolate flavor without noticeable coffee taste. This secret trick amplifies cocoa notes beautifully.
Storage and Make-Ahead Solutions
Store brookies in an airtight container at room temperature for up to 4 days. Layer parchment paper between squares to prevent sticking. They actually taste better on day two when flavors meld together.
Refrigerate for extended freshness up to one week. Bring to room temperature before serving, or warm individual squares in the microwave for 10-15 seconds. The chocolate chips get gloriously melty again.
| Storage Method | Duration | Best For |
|---|---|---|
| Room temperature (airtight) | 4 days | Peak texture and flavor |
| Refrigerated (sealed) | 7 days | Extended freshness |
| Frozen (wrapped tightly) | 3 months | Long-term storage |
| Frozen (unbaked) | 2 months | Fresh-baked convenience |
Freeze individual wrapped squares for up to 3 months. Thaw at room temperature for 30 minutes or microwave from frozen for 20-30 seconds. They maintain quality surprisingly well in the freezer.
You can also freeze unbaked brookies—assemble completely, cover tightly with plastic wrap and foil, then freeze for up to 2 months. Bake directly from frozen, adding 10-15 extra minutes to the baking time.
Perfect Pairings and Serving Ideas
Serve warm brookies with vanilla ice cream melting over the top—the temperature contrast creates magic. Cold milk remains the classic pairing that never disappoints. For adult gatherings, try them alongside espresso or rich hot chocolate.
These pair beautifully with cinnamon sugar blondies for a dessert platter with variety. The spiced blondies complement the chocolate richness perfectly. For holiday cookie exchanges, present them alongside peppermint red velvet blossoms for festive color contrast.
Cut into smaller bite-sized pieces and serve with caramel apple cheesecake bars at fall gatherings. The apple notes balance chocolate intensity nicely. These also make excellent portable treats for picnics and road trips.
Chocolate Chip Cookie Brownies Recipe FAQs
Can I Use a Different Pan Size for This Cookie and Brownie Recipe?
Can I use a different pan size? Yes, but adjust baking time accordingly. A 9×9-inch pan creates thinner brookies that bake in 25-28 minutes. A 9×13-inch pan makes thin bar cookies—reduce time to 20-25 minutes and watch carefully for doneness.
What’s the Best Way to Store Leftover Cookie Recipes Brownie?
What’s the best way to store leftovers? Keep brookies in an airtight container at room temperature for 4 days maximum. Stack them with parchment paper between layers to prevent the cookie top from sticking to brownie bottoms. Never refrigerate unless you’re storing beyond 4 days, as cold temperatures dry them out.
How Do I Know When Brookies Are Done Baking?
How do I know when they’re done? Look for set edges that pull slightly from pan sides while the center still jiggles just barely when shaken. A toothpick inserted in the middle should emerge with moist crumbs, not liquid batter or completely clean. Overbaking creates dry, cake-like texture instead of fudgy perfection.
Can I Make This Brownie and Cookie Recipe Gluten-Free?
Can I make these gluten-free? Absolutely—substitute 1:1 gluten-free baking flour for all-purpose flour in both layers. Add 1/4 teaspoon xanthan gum if your blend doesn’t already contain it. The texture stays remarkably close to the original version with quality gluten-free flour blends.
Your New Favorite Dessert Awaits

These chocolate chip cookie brownies solve every dessert dilemma you’ll ever face. They’re simple enough for weeknight treats yet impressive enough for special occasions. The combination delivers satisfaction that single-flavor desserts simply can’t match.
Remember that summer dessert emergency I mentioned? Now these brookies are the only thing my family requests for celebrations. They’ve become legendary at potlucks—people literally ask for the recipe before tasting them.
Pair your brookies with cheesy garlic rolls for a savory-sweet dinner party finale. Or keep it simple with cold milk and good company. Either way, you’re creating memories that taste like pure happiness.
Ready to create this ultimate fusion dessert in your own kitchen? Mix up a batch this weekend and watch them disappear. Share your results in the comments below—I’d love to hear which variation becomes your favorite. Trust me, once you make these, you’ll understand why choosing between brownies and cookies is officially a problem of the past.

