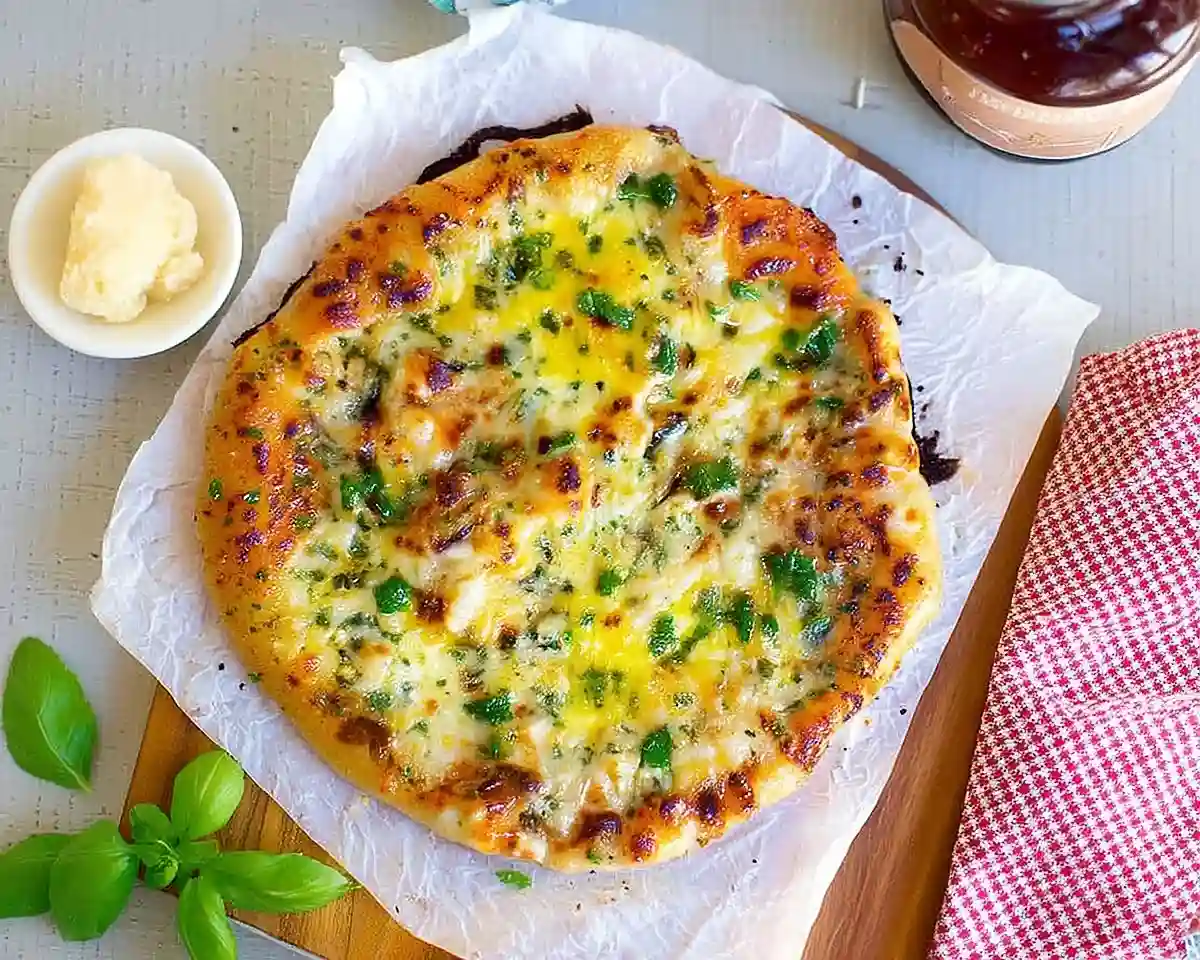
Cheesy Garlic Pizza Bread delivers crispy, buttery crust loaded with melted mozzarella. Ready in 15 minutes with restaurant-quality results every time.
Let me tell you about the time I completely forgot about dinner until 6:47 PM on a Tuesday.
My stomach was growling. My fridge looked like a crime scene. Then I spotted leftover pizza dough sitting there like a golden ticket. That’s when this cheesy garlic pizza bread was born—completely by accident, totally out of desperation, and honestly? It saved my entire week.
I slathered that dough with garlic butter, dumped cheese on top, and cranked my oven to broil. Ninety seconds later, the smell hit me like a warm hug from an Italian grandmother. The edges were golden and crispy. The cheese was bubbling like lava. Moreover, the garlic butter had seeped into every single air pocket.
One bite and I was hooked. The crust cracked perfectly under my teeth. Meanwhile, stretchy mozzarella strings refused to let go. It tasted exactly like those fancy appetizers you order at pizzerias—except I made it in my regular kitchen wearing sweatpants.
I’ve tested this garlic cheese pizza about thirty times since then (my family isn’t complaining). Additionally, I’ve burned exactly four batches learning the perfect broiler timing. But now? It’s foolproof. You’re getting restaurant-quality results without leaving your house or spending twenty bucks on appetizers.
Table of Contents
What Makes This Cheesy Garlic Bread Pizza Special
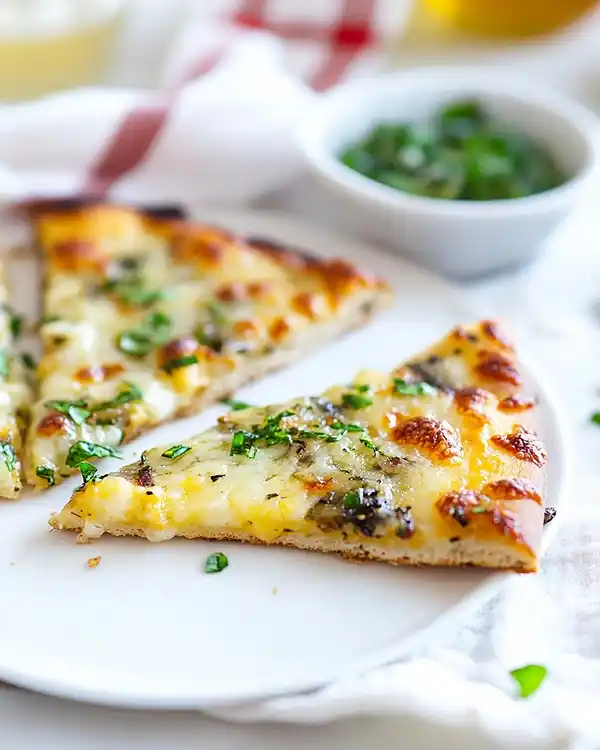
This isn’t your average garlic bread.
First, we’re using actual pizza dough instead of sliced bread. That means you get those characteristic air bubbles and chewy texture that make pizzeria-style bread so addictive. The dough puffs up under high heat, creating pockets that trap garlic butter like little flavor bombs.
Second, we’re broiling this bad boy. Most recipes bake garlic bread at a moderate temperature. However, broiling caramelizes the cheese quickly while keeping the inside soft. You’ll get that restaurant char without drying anything out.
Third, the garlic butter soaks through before baking. Consequently, every bite tastes garlicky—not just the top. I learned this trick from watching Thomas Keller prep bread service at fancy restaurants. He always emphasized penetrating flavor rather than surface seasoning.
I’ve made this for game nights, last-minute guests, and “I don’t feel like cooking” evenings. It works every single time. Furthermore, the ingredient list is ridiculously short. You probably have most items already sitting in your kitchen.
The best part? People think you spent hours on it. Let them believe that. I won’t spill the beans.
Ingredients You’ll Need
Here’s everything for your pizzeria style cheesy bread. I’m giving you both US and metric measurements because I’m nice like that.
| Ingredient | US Measurement | Metric | Notes |
|---|---|---|---|
| Fresh pizza dough | 1 round | 450g | Store-bought works perfectly |
| Unsalted butter | 3 tablespoons | 42g | Room temperature is crucial |
| Garlic cloves | 2 cloves | 6g | Finely chopped, not pressed |
| Fresh parsley | 2 tablespoons | 8g | Finely chopped |
| Sea salt flakes | ½ teaspoon | 3g | Maldon or similar |
| Fresh mozzarella | 1 cup | 113g | Grated, not pre-shredded |
| Parmesan or Pecorino | 4 tablespoons | 28g | Finely grated |
| Red sauce | 1 cup | 240ml | For dipping |
Shopping Tips for US Grocery Stores
Pizza Dough: Check the refrigerated section near the cheese. Trader Joe’s sells excellent dough for about three bucks. Whole Foods makes fresh dough daily. Many pizza places will also sell you dough if you ask nicely.
Fresh Mozzarella: Skip the pre-shredded stuff in bags. It contains anti-caking agents that prevent proper melting. Instead, grab a ball of fresh mozzarella from the deli section. Grate it yourself using the large holes on a box grater.
Butter Quality: Use good butter here. It’s a starring ingredient, not a background player. European-style butter has higher fat content and tastes noticeably richer. Kerry Gold is widely available and worth the extra dollar.
Garlic: Fresh cloves only. Jarred minced garlic tastes like sad disappointment compared to freshly chopped. Two medium cloves equal about one tablespoon when minced.
Bold Add-Ins & Creative Variations
Want to customize your garlic cheese pizza? Try these options:
- Red pepper flakes (¼ teaspoon for heat)
- Italian seasoning (½ teaspoon for herbaceous depth)
- Truffle oil (drizzle after baking for luxury vibes)
- Crispy bacon bits (because bacon makes everything better)
- Caramelized onions (sweet contrast to salty cheese)
International Substitutions
Can’t find pizza dough? Use naan bread or pita. The texture differs, but it still tastes amazing.
No fresh mozzarella? Low-moisture mozzarella works. Just reduce the amount slightly since it’s drier.
Parsley unavailable? Fresh basil or oregano substitute beautifully. Dried herbs work in a pinch—use one-third the amount.
Equipment & What You Actually Need
You don’t need fancy equipment for this. However, certain tools make your life easier.
Essential Equipment
Pizza stone or baking steel: This is the game-changer. It mimics a professional pizza oven by providing intense, even heat. I use a baking steel because it heats faster and retains temperature better than stone. If you don’t have either, flip a baking sheet upside down and use that.
Pizza peel: You need something to slide your dough into the screaming-hot oven. A rimless baking sheet works as a substitute. Just dust it heavily with semolina flour so nothing sticks.
Pastry brush: For spreading garlic butter evenly. A spoon works, but brushes give better coverage. Additionally, brushes prevent tearing delicate dough.
Box grater: For shredding fresh mozzarella. The pre-grated stuff doesn’t melt the same way—trust me on this.
Nice-to-Have Tools
Bench scraper: Helpful for handling sticky dough without making a mess.
Kitchen timer: Broilers work fast. Thirty seconds is the difference between perfect and burnt. Set multiple timers if you’re easily distracted like me.
Oven thermometer: Many ovens lie about their actual temperature. A five-dollar thermometer prevents disasters.
Step-by-Step Instructions
Step 1: Prep Your Dough (1 Hour Before)
Remove pizza dough from the fridge. Let it sit at room temperature for one full hour.
Why does this matter? Cold dough fights you when you try stretching it. It snaps back like a rubber band and refuses to cooperate. Room temperature dough relaxes and stretches easily. Therefore, you get better shape and texture.
Cover the dough loosely with a damp towel while it warms up. This prevents the surface from drying out and forming a skin.
Step 2: Preheat Like You Mean It (1 Hour Before)
Place your baking steel, pizza stone, or inverted baking sheet on the top rack. Preheat your oven to 500°F (or as hot as it goes) for one full hour.
Yes, one hour. This isn’t negotiable.
Professional pizza ovens hit 800°F. Your home oven can’t reach that, but proper preheating gets you closer. The steel needs time to absorb heat completely. Oops! I once skipped preheating properly and got sad, pale, floppy bread. Learn from my mistake.
Critical step: Place a second baking sheet on the lower rack. This catches butter drippings. Otherwise, you’ll have smoking, burning butter all over your oven floor. I learned this the hard way during Thanksgiving prep last year. My kitchen smelled like burnt butter for three days.
Step 3: Make the Garlic Butter
Combine softened butter, chopped garlic, parsley, and sea salt in a small bowl. Mix thoroughly until everything’s evenly distributed.
Set this near your preheating oven. The ambient heat will slightly melt the butter, making it easier to spread. However, don’t let it fully liquefy—you want a spreadable paste consistency.
Pro tip from Julia Child: She always emphasized room-temperature ingredients. Cold butter tears dough. Room-temperature butter glides across it beautifully, creating an even coating.
Chop your garlic finely but not into mush. You want tiny pieces that distribute evenly without creating overwhelming garlic bombs. I use a sharp chef’s knife and rock it back and forth over the cloves.
Step 4: Switch to Broil
Once your steel is scorching hot and your dough is relaxed, switch your oven to broil.
This is where the magic happens. Broiling provides intense top-down heat that caramelizes cheese quickly. Meanwhile, the blistering-hot steel cooks the bottom simultaneously. You get crispy edges, melty cheese, and perfectly cooked dough all at once.
Step 5: Stretch and Prep Your Dough
Dust your pizza peel (or rimless baking sheet) lightly with semolina flour. This acts like tiny ball bearings, letting your finished bread slide off easily.
Stretch your dough into a 12-inch round. Don’t use a rolling pin—that destroys the air bubbles you want. Instead, use your hands to gently press and stretch from the center outward.
If the dough resists, let it rest for five minutes. Then try again. Fighting with dough never works. It always wins.
Place your stretched round on the semolina-dusted peel. Give it a little shake to ensure it moves freely. If it sticks anywhere, lift that section and add more semolina underneath.
Step 6: Apply Garlic Butter Generously
Using your pastry brush or a spoon, spread garlic butter liberally over the entire dough surface. Don’t be shy here. You want edge-to-edge coverage.
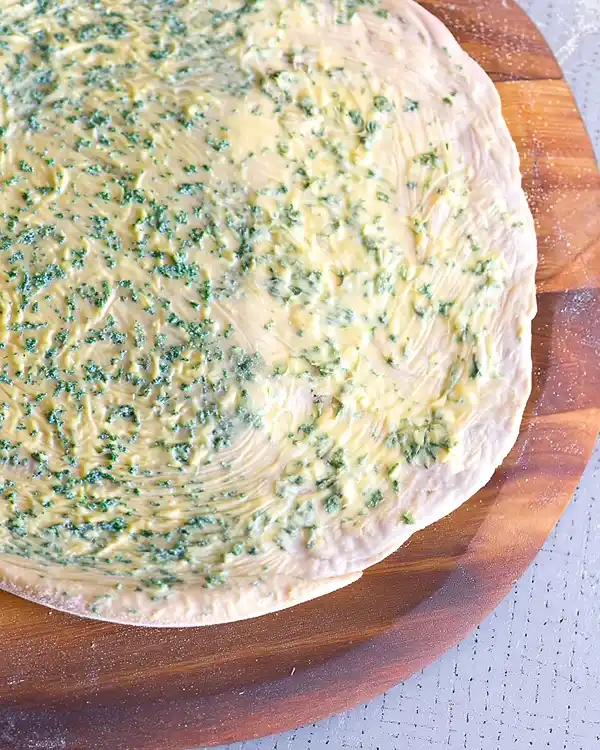
Make sure to get into any cracks or folds. Those spots need flavor too. I typically use about two tablespoons for full coverage, then save the remaining tablespoon for brushing the crust after baking.
The butter should soak into the dough slightly. That’s perfect. You’re building flavor from the inside out.
Step 7: Add the Cheese
Sprinkle your grated mozzarella evenly across the buttered surface. Leave about half an inch around the edges for crust formation.
Top with most of your parmesan, but reserve a tablespoon for sprinkling after baking. Fresh parmesan has incredible flavor when it hits hot bread straight from the oven.
Cheese distribution matters: Even coverage means every bite tastes consistent. Clumps create spots that burn while other areas stay pale.
Step 8: Launch Into the Oven
This is the scary part, but you’ve got this.
Open your oven door. Touch your peel down at the back edge of your baking steel or stone. Give your peel a slight shimmy—not aggressive, just gentle movement. The bread should start sliding off.
Pull the peel toward you slowly as the bread settles onto the hot surface. If it catches, use a quick jerking motion to free it. Don’t panic. I’ve launched plenty of wonky-shaped breads that still tasted incredible.
Step 9: Bake and Rotate
Bake for 90 seconds under the broiler. Then open the oven carefully and rotate your bread 180 degrees using tongs or your peel.
Why rotate? Broilers have hot spots. Rotating ensures even browning. Close the oven and broil for another 30 seconds.
Watch it closely during this phase. Broilers are aggressive. Cheese can go from golden to burnt in literally ten seconds.
Step 10: Finish Baking
Once the top looks beautifully browned, switch your oven back to convection bake at 500°F. Bake for 1-2 more minutes.
This step ensures the bottom gets fully crispy while the inside cooks through. You want the underside spotty brown with a satisfying crunch.
Step 11: Final Touches
Remove your cheesy garlic pizza bread carefully using your peel. Brush the puffy crust edges with your reserved garlic butter while everything’s still hot.
Sprinkle with remaining parmesan and fresh parsley. The residual heat will slightly melt the cheese and release the parsley’s aroma.
Slice immediately using a pizza cutter or sharp knife. Serve with a big bowl of warm red sauce for dipping.
Expert Tips for Perfect Garlic cheese pizza Results
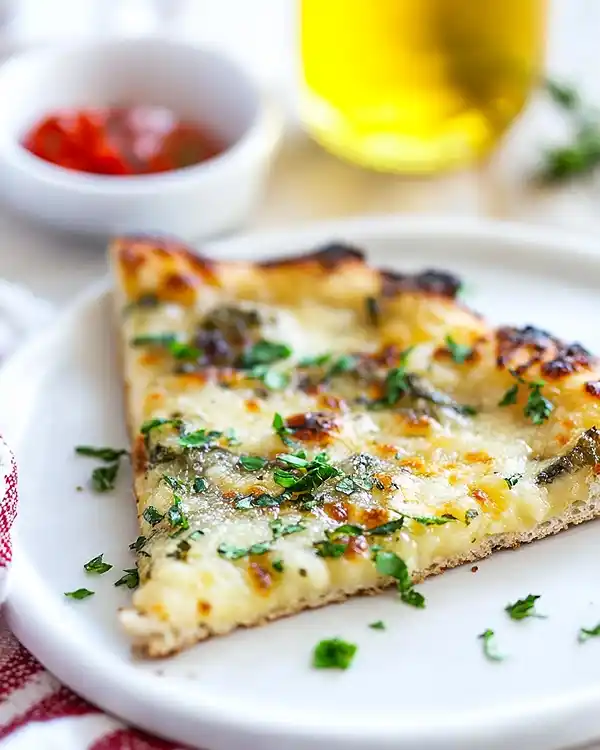
Temperature is everything: Your oven needs to be genuinely hot. If your oven maxes out at 450°F, add an extra minute to the baking time.
Don’t skip the semolina: Regular flour works, but semolina has larger granules that prevent sticking better. You can find it in the baking aisle near specialty flours.
Fresh mozzarella melts differently: It contains more moisture than low-moisture mozzarella. Pat it dry with paper towels after grating if it seems wet. Excess moisture creates soggy bread.
Garlic burns easily: Keep pieces small and evenly distributed. Big chunks turn bitter under high heat.
Work quickly: Once your dough hits that hot steel, the clock starts ticking. Have everything prepped and ready before you open the oven.
Let your oven recover: If making multiple rounds, give your steel 10-15 minutes between batches to reheat fully.
Creative Variations to Try
White Pizza Version
Skip the red sauce. Use ricotta mixed with mozzarella. Add a drizzle of honey after baking. Sweet and savory magic happens.
Spicy Calabrian Style
Mix Calabrian chili paste into your garlic butter. Top with spicy soppressata and hot honey after baking. Your mouth will thank me.
Breakfast Pizza Bread
Top with scrambled eggs, crispy bacon, and cheddar after baking. Drizzle with maple syrup. Yes, seriously. Try the Southern Maple Sweet Potato Casserole for more sweet-savory inspiration.
Herby Garden Version
Replace parsley with a mix of fresh basil, oregano, and thyme. Add sun-dried tomatoes and goat cheese. Very Mediterranean vibes.
Holiday Cranberry Brie
Top with brie and dried cranberries after baking. Drizzle with balsamic reduction. Perfect for Christmas appetizers alongside Baked Brie with Fig Jam and Pecans.
Storage and Make-Ahead Tips
Here’s how to keep your pizzeria style cheesy bread fresh or prep it ahead.
| Storage Method | Duration | Instructions |
|---|---|---|
| Room temperature | 2 hours | Cover loosely with foil |
| Refrigerator | 3 days | Wrap tightly in plastic wrap |
| Freezer | 1 month | Wrap in foil, then plastic |
| Reheat from frozen | 15 minutes | Bake at 375°F until hot |
Make-ahead strategy: Assemble everything on parchment paper instead of a peel. Freeze the entire unbaked bread on a baking sheet until solid. Transfer to a freezer bag. When ready to eat, bake directly from frozen—just add two extra minutes.
Reheating without sogginess: Never microwave this. Always use your oven at 375°F for 8-10 minutes. The crust stays crispy, and the cheese melts again perfectly.
Best eaten fresh: Like most bread-based items, this tastes best within the first hour. However, proper storage keeps it delicious for days.
Perfect Pairings
This garlic cheese pizza pairs beautifully with:
Soups: Tomato basil, minestrone, or Italian wedding soup. The bread becomes an edible spoon for broth.
Salads: Caesar, caprese, or simple arugula with lemon. The richness balances fresh greens nicely.
Pasta: Any tomato-based pasta dish works. Try it alongside classic spaghetti and meatballs.
Wine: Chianti, Montepulciano, or even a crisp Pinot Grigio. The garlic butter can handle bold reds.
Beer: Lagers, pilsners, or wheat beers. Avoid anything too hoppy—it clashes with garlic.
Want to round out your meal? Serve it with Garlic Herb Roasted Potatoes for a complete garlic-lover’s feast.
For more Italian-inspired comfort food ideas, check out Serious Eats’ guide to essential Italian appetizers for additional serving suggestions.
Cheesy Garlic Pizza Bread FAQs
Can I use store-bought pizza dough for cheesy garlic pizza bread?
Absolutely! Store-bought dough works perfectly for this recipe. Just let it come to room temperature for the full hour before stretching. Fresh dough from your local pizzeria often has better flavor than refrigerated grocery store versions, but both deliver excellent results.
How do I know when my cheesy garlic bread pizza is done?
Your bread is ready when the cheese is golden brown and bubbling, the crust edges are puffy and crispy, and the bottom has dark brown spots. If you lift the edge with tongs, you should see caramelization underneath. The entire process takes about 4-5 minutes total once it hits the oven.
Can I make garlic cheese pizza without a pizza stone?
Yes! Flip a regular baking sheet upside down and preheat it the same way. The results won’t be quite as crispy as a pizza steel, but you’ll still get delicious bread. Alternatively, bake directly on a preheated cast-iron skillet for excellent heat retention.
What’s the best dipping sauce for pizzeria style cheesy bread?
Traditional marinara sauce is classic and never disappoints. However, try ranch dressing, alfredo sauce, or even balsamic reduction for variety. I keep Christmas Crockpot Candy on hand during holidays, but for everyday eating, a quality jarred marinara heated with fresh basil works wonderfully.
Final Thoughts: Your New Favorite Appetizer
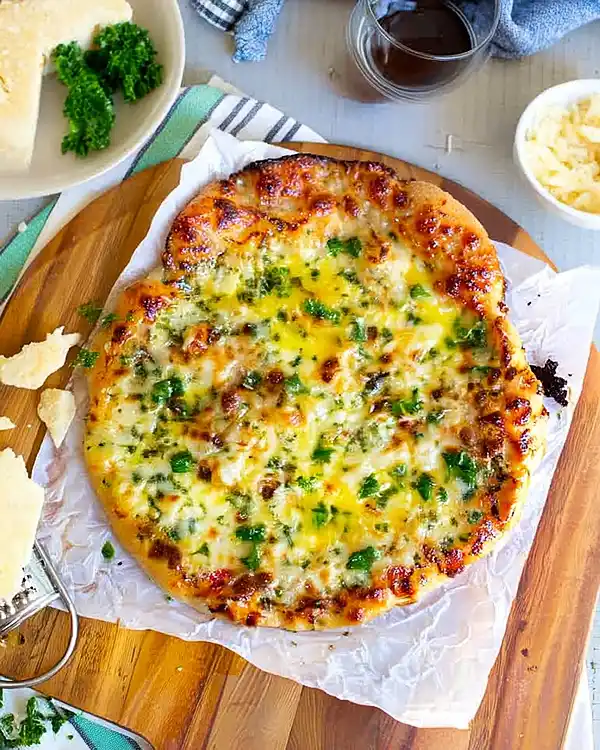
Man, oh man, this cheesy garlic pizza bread has saved countless dinners at my house.
It’s the recipe I make when friends text “coming over in 20 minutes” without warning. It’s what I serve at game-day parties when everyone’s already full but keeps eating anyway. Moreover, it’s what I crave at 10 PM when I need comfort food but don’t want to order delivery.
The best part? You’re now part of the secret club of people who can make restaurant-quality appetizers at home. Your kitchen will smell like an Italian bakery. Your family will hover near the oven waiting for that first slice. And you’ll feel like a culinary genius for minimal effort.
Serve this at your next gathering with a big bowl of marinara. Watch it disappear in under five minutes. Then make another round because everyone will beg for seconds.
If you love this recipe, you’ll probably obsess over Old Fashioned Divinity Candy too—both are crowd-pleasers that look way harder than they actually are.
Make this tonight. Tag me with your results. And remember: when in doubt, add more garlic butter. That’s my life philosophy, and it hasn’t failed me yet.
Tasty at Home – Where bold flavors meet everyday kitchens.
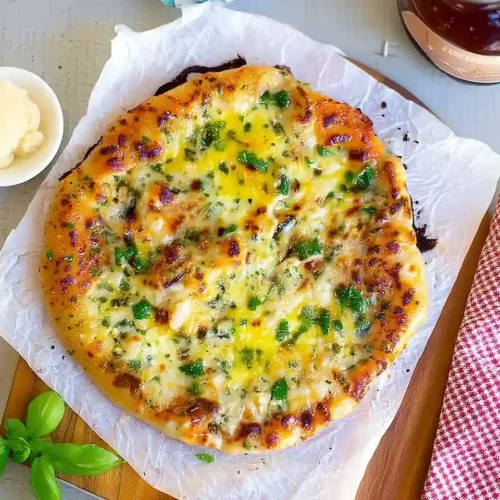
Cheesy Garlic Pizza Bread
Equipment
- Oven
- Pizza stone or baking steel
- Pizza Peel
- Pastry brush
- box grater
- Baking sheet
- Mixing bowl
Ingredients
Main
- 1 round Fresh pizza dough 450g, store-bought works perfectly
- 3 tablespoons Unsalted butter 42g, room temperature
- 2 cloves Garlic 6g, finely chopped
- 2 tablespoons Fresh parsley 8g, finely chopped
- ½ teaspoon Sea salt flakes 3g, Maldon or similar
- 1 cup Fresh mozzarella 113g, grated
- 4 tablespoons Parmesan or Pecorino 28g, finely grated
- 1 cup Red sauce 240ml, for dipping
Instructions
- Remove pizza dough from the fridge and let it rest at room temperature for one hour under a damp towel.
- Preheat oven with baking steel or stone at 500°F for one hour. Place a second tray below to catch drips.
- Mix softened butter, chopped garlic, parsley, and sea salt in a bowl to make garlic butter.
- Switch oven to broil. Stretch dough into a 12-inch round and place it on a semolina-dusted peel.
- Brush garlic butter evenly across the dough, making sure to cover edges.
- Top with grated mozzarella and parmesan, leaving a half-inch border for crust.
- Slide the dough onto the hot steel or stone. Broil for 90 seconds, rotate, then broil 30 seconds more.
- Switch oven to 500°F convection bake and bake 1–2 minutes until crust is golden and crispy.
- Remove from oven, brush crust with remaining garlic butter, sprinkle parmesan and parsley, then slice and serve with red sauce.

