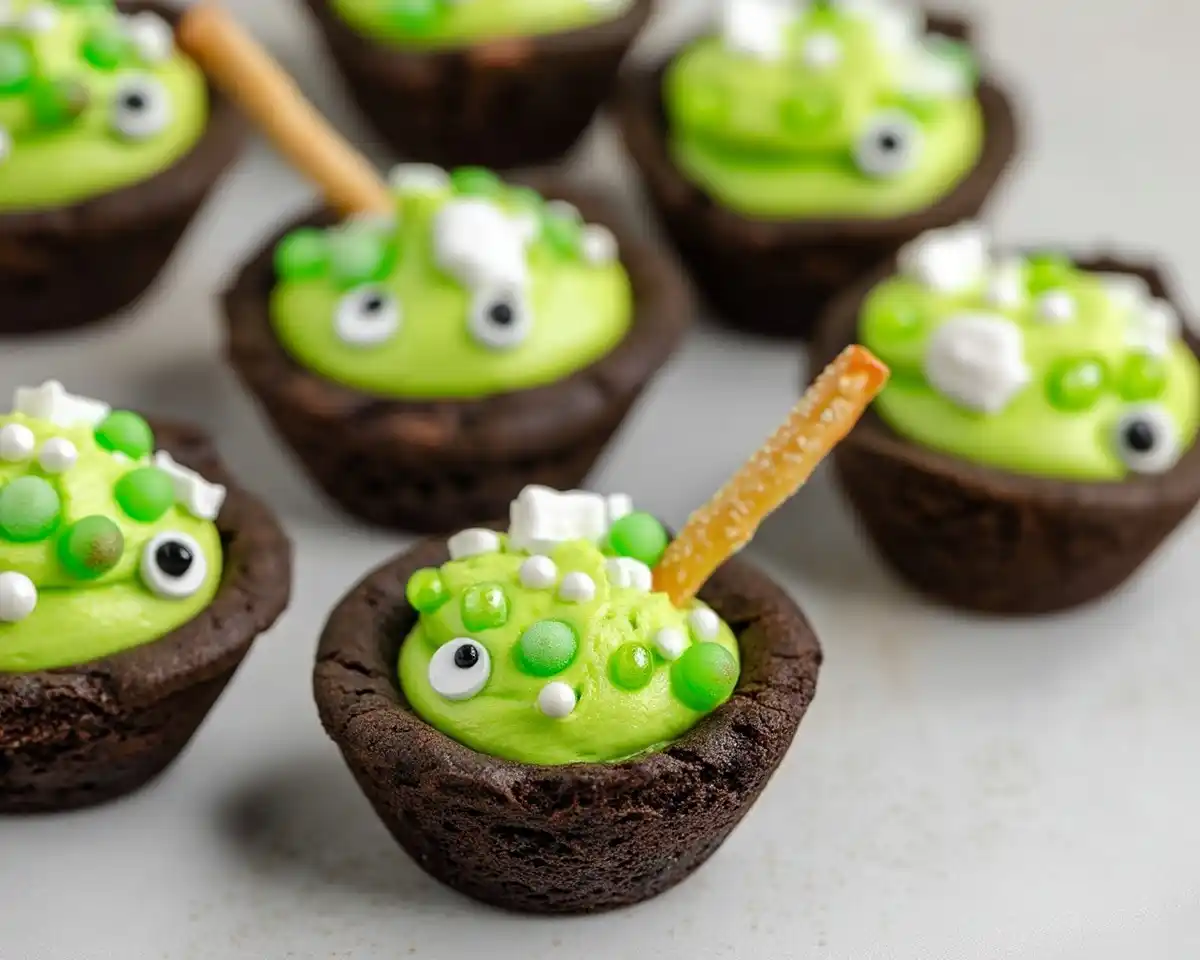
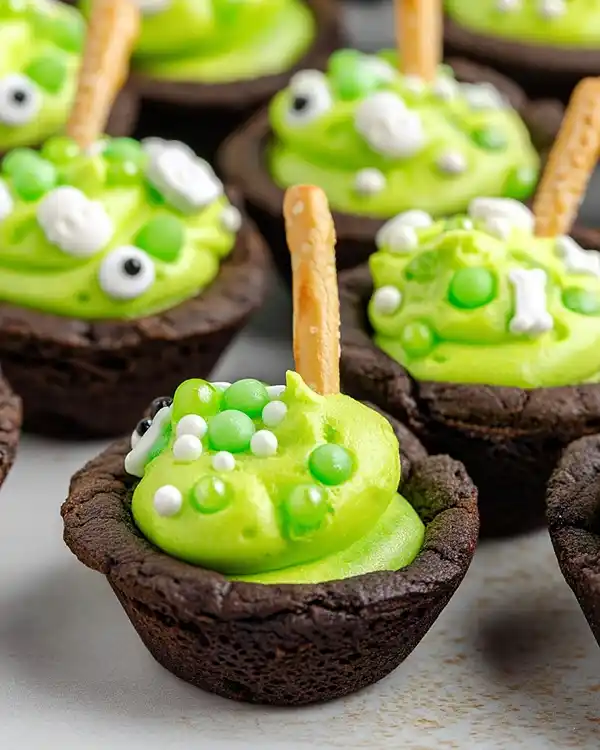
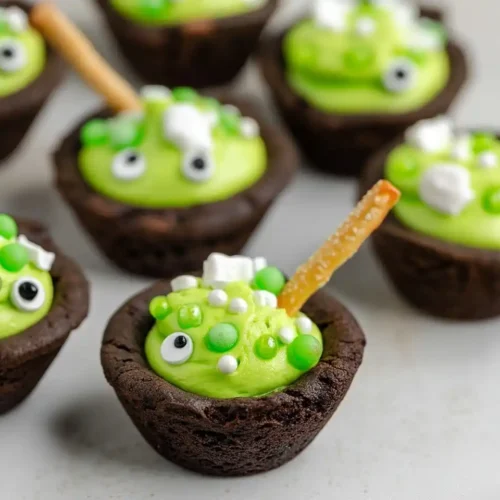
Whip up magical Halloween fun with these easy Cauldron Cookies — soft devil’s food cookie cups filled with green buttercream, candy eyes, and sprinkles. A spooky-cute kid dessert that steals the show at every party!
Last Halloween, my daughter came home from school bouncing with excitement. She’d seen cauldron cookies at a classmate’s party, and suddenly, our entire kitchen became mission control for recreating them.
Well, let me tell you, one batch turned into three batches, and now they’re the treat that appears in every Halloween gathering we host.
Cauldron cookies are absolutely the ultimate Halloween kid treats for school because they combine simplicity with pure magic.
These fondant-filled cookie cups transform into bubbling witch’s cauldrons with just a few creative touches. The result? Kids go wild, parents look like kitchen geniuses, and you’ve got the most Instagram-worthy dessert on the table.
Here’s what makes these special: they’re easier than you think, they’re showstoppers, and they taste incredible. Whether you’re preparing Halloween kid desserts for classroom parties or trick-or-treat night, cauldron cookies deliver excitement on every bite.
Table of Contents
What Makes These Cauldron Cookies So Uniquely Magical
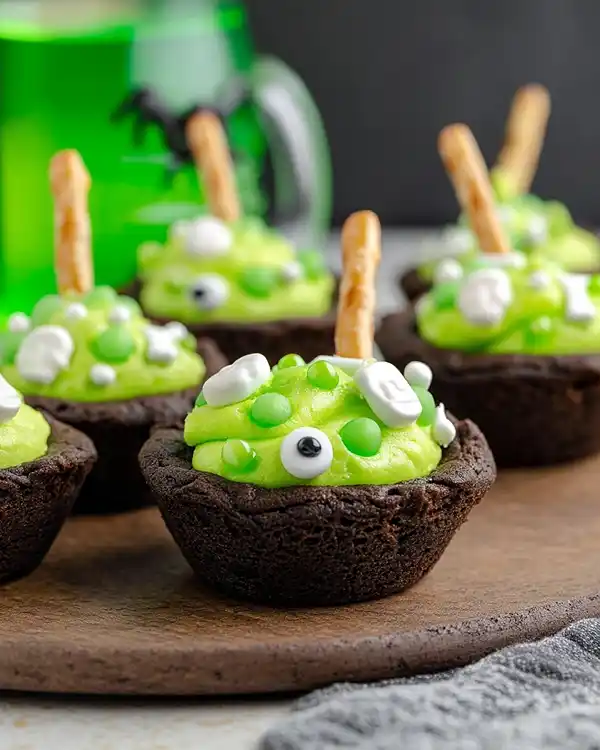
These aren’t ordinary cookies. Instead, they’re edible mini cauldrons that tell a Halloween story right on the plate. The magic happens when you combine devil’s food cake mix with simple technique and creative decorating.
The foundation starts with cake mix, which means you’re skipping complicated measuring and mixing. The real artistry comes from the indentation step, which transforms flat cookies into dimensional cups ready for filling.
When you fill them with bright green buttercream and top with sprinkles and candy eyes, something extraordinary happens. You’ve created an edible works of art that tastes as good as it looks.
Last Thanksgiving, I realized that this technique applies to so many occasions beyond Halloween. The same concept works for spring flowers or patriotic designs. But for Halloween kid treats for school, nothing beats the witchy cauldron theme.
The expertise here matters. Professional bakers (think Thomas Keller’s precision approach) understand that proper technique transforms simple ingredients into showstoppers.
The key lies in timing—pressing your indentation while the cookies are still warm keeps the shape, while cool cookies would crack. You know, this one detail separates “nice cookies” from “wow, these are incredible cookies.”
Ingredients for Terrific Cauldron Cookie Cups
Cookies
| Ingredient | Measurement | Metric |
|---|---|---|
| Devil’s Food cake mix | 1 (15.25 oz) box | 432g |
| Large eggs | 2 | 2 |
| Canola or vegetable oil | 1/2 cup | 118ml |
| Black food coloring | Optional | Optional |
Buttercream Frosting
| Ingredient | Measurement | Metric |
|---|---|---|
| Unsalted butter, softened | 1 cup | 226g |
| Powdered sugar | 3 cups | 360g |
| Vanilla extract | 1 teaspoon | 5ml |
| Salt | 1/2 teaspoon | 2.5g |
| Milk | 1-3 tablespoons | 15-45ml |
| Green food coloring | To taste | To taste |
Decorations
| Topping | Quantity |
|---|---|
| Round green sprinkles | 1 cup |
| Halloween sprinkles | 1/2 cup |
| Candy eyeballs | 1 package |
| Pretzel sticks | 1 bag |
Shopping Tips for US Grocery Stores
Finding these ingredients? Absolutely simple. Most standard grocery stores carry devil’s food cake mix in the baking aisle year-round. During October, Halloween-themed sprinkles and candy eyeballs appear in dedicated seasonal sections.
Look for unsalted butter in the dairy section—we use unsalted so you control the salt content. Powdered sugar lives near granulated sugar in the baking aisle.
Green food coloring comes in both liquid and gel forms. Gel coloring creates more vibrant shades and requires less product, making it the professional baker’s choice.
For pretzel sticks, the snack aisle works, though specialty food stores often carry gourmet options. Round green sprinkles sometimes require a specialty or online search, but standard Halloween sprinkles work beautifully as backups.
Quality Ingredient Selection
Oops, I almost forgot to mention butter quality. Using high-quality butter creates tangibly smoother frosting. Cultured butter adds depth, but standard butter works fine. The difference? Slight, but noticeable if you’re particular about texture.
Eggs make a difference too. Room-temperature eggs blend seamlessly into your cake batter, creating more even texture. Cold eggs take longer to incorporate and can create lumpy dough.
Food coloring concentration matters. Start with a few drops, then add gradually. You can always deepen the color, but removing excess coloring requires more frosting, throwing off your ratios.
Equipment You’ll Need
Three 12-count mini muffin pans form the foundation here. Standard nonstick pans work best, though greasing regular pans prevents sticking equally well.
A large mixing bowl accommodates your cake batter without splattering. A medium bowl handles frosting preparation perfectly. You’ll also want measuring spoons and cups for accuracy.
The secret tool? A 1-tablespoon measuring spoon becomes your cookie cup mold. The rounded back creates perfect indentations when pressed into warm cookies. Alternatively, the bottom of a small rounded measuring spoon or the back of a shot glass works in a pinch.
An electric mixer streamlines frosting preparation. You can absolutely mix by hand, but the mixer creates smoother texture faster. A piping bag with a large star tip transforms your frosting into bubbling cauldron effects. Round piping tips work too, just skip the star pattern.
Step-by-Step Instructions for Perfect Cauldron Cookies
Step 1: Prepare Your Pans and Preheat
Start by preheating your oven to 350 degrees Fahrenheit. While it heats, lightly grease three 12-count mini muffin pans with cooking spray or butter. Greasing prevents sticking and ensures clean removal.
Why 350 degrees? This temperature bakes cookies through without burning the bottoms. Mini cookies bake faster than standard sizes, so lower heat prevents edges from setting while centers remain dough-like.
Step 2: Mix Your Cookie Dough
In a large bowl, combine the devil’s food cake mix, two large eggs, and 1/2 cup canola oil. Stir until just combined. The mixture resembles thick brownie batter, which is exactly right.
Here’s where creativity enters: add black food coloring if you want darker, more dramatic-looking cauldrons. Start with just three drops, stirring well. The coloring intensifies as it distributes. You’re aiming for deep brown-black, not navy.
Pro tip: Don’t overmix. This creates tough, dense cookies. Stir until ingredients just combine, then stop. Julia Child often emphasized respecting ingredient texture, and cookie batter is no exception. Overmixing develops gluten, which belongs in bread, not desserts.
Step 3: Fill and Shape
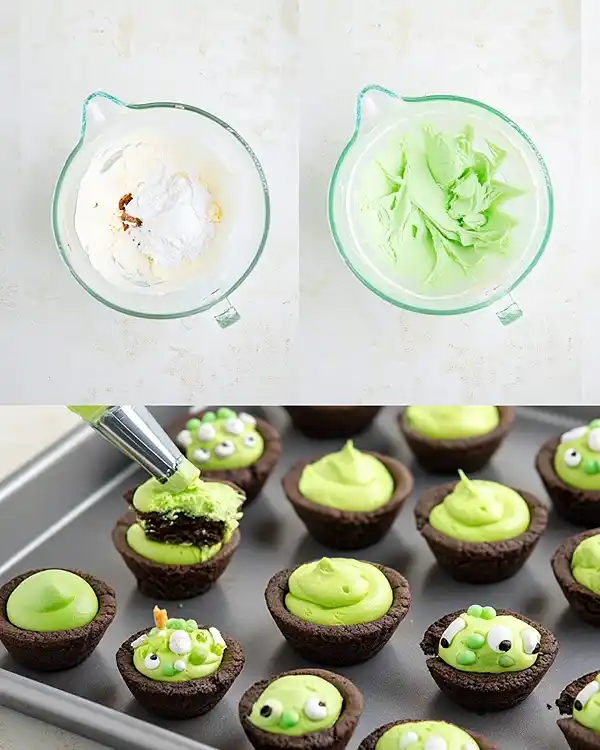
Using a small spoon or 1/2-tablespoon measuring spoon, scoop dough into each mini muffin cup. You’ll fill approximately 36 cookies across three pans. Press dough gently to flatten slightly against the bottom and sides of each cup.
The dough shouldn’t fill the cup completely. Leave about 1/4 inch from the rim. This space allows room for your indentation without overflow during baking.
Step 4: Bake and Create Indentations
Bake for 8 to 10 minutes, watching carefully. The edges should look set and slightly darker, while centers still feel soft. Remove from the oven immediately. Man, oh man, this timing matters.
Immediately press your 1-tablespoon measuring spoon’s rounded back into each warm cookie, creating a shallow cup. Hold for just two seconds, then gently remove. The residual heat allows cookies to hold their shape perfectly.
Let me tell you about my first attempt at this step: I waited too long. The cookies cooled, hardened, and pressing created cracked, broken cauldrons. Now I press within 30 seconds of removing from the oven. Timing determines success here.
Set pans aside and allow cookies to cool completely, about 30 minutes. Once cool, gently pop cookies from pans. They should release easily from greased pans.
Step 5: Prepare Your Buttercream Frosting
In a medium mixing bowl, beat softened butter until creamy and pale, about two minutes with an electric mixer. Gradually add powdered sugar, one cup at a time, beating well between additions. This prevents lumps and ensures smoothness.
Add vanilla extract and salt. Beat again until combined. The frosting should appear thick and fluffy. Now add milk one tablespoon at a time, beating until you achieve a spreadable consistency. One to two tablespoons usually suffices, though humidity affects exact amounts.
Finally, add green food coloring drop by drop until you reach your desired shade. Start with five drops, then add more gradually. Green intensifies as it distributes, so patience prevents overcoloring. You’re creating bubbling witches’ potion, so vibrant green works best.
Step 6: Fill Your Cauldron Cookies
Fill a piping bag fitted with a large star tip with your green buttercream. Pipe frosting into each cooled cookie cup, filling generously to create that bubbling-over effect. The stars of the piping tip create visual texture that resembles boiling potion.
If you’re without a piping bag, spoon frosting into a small plastic bag, snip a corner, and improvise. It works beautifully and requires no special equipment.
Step 7: Decorate with Halloween Magic
Now the fun part. Top each frosting-filled cauldron with green sprinkles, then add Halloween-themed sprinkles for extra flair. Press two candy eyeballs into the frosting, creating an eerie witchy face.
Break pretzel sticks in half and insert one into the frosting of each cauldron as a stirring stick. Arrange eyeballs and sprinkles however delights you. There’s no wrong way—creativity reigns here.
Pro Tips for Success
Room-temperature ingredients mix more smoothly than cold ones. Remove butter and eggs from the refrigerator 30 minutes before baking.
Use gel food coloring instead of liquid when possible. Gel creates vibrant colors without thinning frosting consistency.
Make these cookies one day before serving. They stabilize overnight, making them easier to transport to school or parties.
Creative Variations for Halloween Kid Treats
Monster Mouth Cauldrons
Instead of green frosting, use purple or orange. Add candy teeth around the rim for a monster face instead of witchy cauldron vibes.
Potion Color Variations
Experiment with purple frosting for poison potions or red for “blood” cauldrons. Each color tells a different Halloween story while using identical techniques.
Peanut Butter Cauldrons
Swap 1 tablespoon of the oil for creamy peanut butter in the cookie dough. Create chocolate buttercream instead of green for a completely different flavor profile.
Brownie Cauldrons
Substitute brownie mix for cake mix, increasing oil to 2/3 cup. The darker color and richer flavor appeal to chocolate lovers.
Gluten-Free Cauldrons
Use your favorite gluten-free cake mix as a direct substitute. Results match traditional versions perfectly, making these inclusive for dietary needs.
Storage and Make-Ahead Strategies
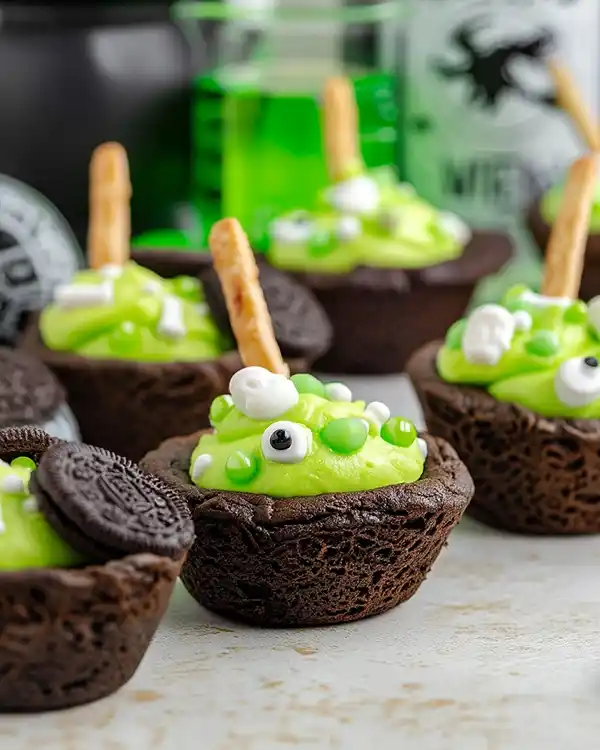
Cauldron cookies stay fresh for five days in an airtight container at room temperature. The buttercream frosting maintains its consistency and flavor throughout this period.
Storage Guide
| Storage Method | Duration | Best For |
|---|---|---|
| Airtight container, room temperature | 5 days | Short-term storage |
| Airtight container, refrigerator | 10 days | Extended storage |
| Freezer, in container | 3 months | Long-term freezing |
| Freezer, unfrosted cookies only | 4 months | Maximum duration |
Store unfrosted cookies separately from frosting. Cookies can be prepared days in advance and frosted the morning of serving for optimal freshness and texture.
To freeze, place cooled, unfrosted cookies in an airtight container with parchment between layers. Thaw at room temperature for 30 minutes before frosting. Frosted cookies freeze less successfully due to frosting texture changes, though they remain edible up to three months.
Perfect Serving Suggestions
These Halloween kid desserts shine on their own, but pairing elevates the experience. Serve with cold milk for the ultimate combination—the creamy milk complements the rich chocolate and buttercream beautifully.
For complete Halloween menus, consider our easy mini Halloween pizzas as a savory starter. These provide contrast before sweet cauldron cookies.
Pair with our Halloween chocolate pretzel spider webs for a dessert spread that covers texture variety. Crispy-chewy pretzels balance soft, creamy cookies perfectly. Add our jack-o-lantern quesadillas for complete Halloween kid treats for school that satisfy all taste preferences.
Consider bat Oreos cookies alongside cauldrons for chocolate lovers. The combination creates an indulgent Halloween experience that impresses any crowd.
For Halloween parties, arrange cauldron cookies on a tiered stand for visual drama. The varying heights and green frosting create that witches’ potions display that screams Halloween magic.
Frequently Asked Questions About Cauldron Cookies
What Is a Witch’s Cauldron Made Of?
In folklore and fantasy, witches’ cauldrons traditionally feature cast iron construction. However, our edible versions use cake mix and buttercream—far more delicious and infinitely more fun to eat. The candy eyes and pretzel stick create the theatrical cauldron appearance that captures Halloween spirit.
What Do You Cook in a Cauldron?
Traditional Halloween cauldrons bubble with mysterious potions and magical brews. Our version cooks nothing but looks like it could brew something absolutely magical. The green buttercream frosting resembles bubbling potion perfectly, creating that witchy atmosphere kids love. These Halloween kid desserts tell an entire story through decoration.
How Long Do Cauldron Cookies Last?
Cauldron cookies stay fresh for five days in an airtight container at room temperature. Refrigeration extends freshness to ten days. Freezing allows storage for up to three months, making these perfect for advance preparation. Proper storage keeps frosting creamy and cookies soft throughout the duration.
Can I Make Cauldron Cookies Without Black Food Coloring?
Absolutely yes. Skip black coloring entirely for brown cauldrons, which look equally impressive. The cake mix creates natural brown tone that darkens during baking. Green frosting still creates witchy contrast without darker cookies, so the overall effect remains spectacular.
The Bottom Line
You now possess the complete blueprint for creating Halloween kid treats for school that astound classmates and parents alike. Cauldron cookies deliver impressive presentation combined with genuine deliciousness—no complicated techniques required.
Remember that first batch I made? My daughter requested them for every celebration afterward. These Halloween kid desserts transformed from one-time experiment into family tradition. They’ve appeared at school parties, family gatherings, and Halloween trick-or-treat nights.
The beauty lies in the transformation. Simple cake mix becomes magical through technique. Basic buttercream becomes bubbling potion through color and presentation. Green sprinkles and candy eyes become witchy personality through creativity.
Start your cauldron cookie adventure today. Gather your ingredients, preheat that oven, and prepare for kitchen magic. Your Halloween celebrations deserve something terrific, and these cookies deliver exactly that.
Tasty at Home – Where bold flavors meet everyday kitchens.
Cauldron Cookies
Equipment
- Mini muffin pans
- Large mixing bowl
- Medium mixing bowl
- Measuring cups and spoons
- Electric mixer
- Piping bag with star tip
- 1-tablespoon measuring spoon
- Cooling rack
Ingredients
Cookies
- 1 box (15.25 oz) Devil’s food cake mix 432g
- 2 Large eggs
- ½ cup Canola or vegetable oil 118ml
- Black food coloring optional
Buttercream Frosting
- 1 cup Unsalted butter, softened 226g
- 3 cups Powdered sugar 360g
- 1 teaspoon Vanilla extract 5ml
- ½ teaspoon Salt 2.5g
- 1-3 tablespoons Milk 15-45ml
- Green food coloring to taste
Decorations
- 1 cup Round green sprinkles
- ½ cup Halloween sprinkles
- 1 package Candy eyeballs
- 1 bag Pretzel sticks
Instructions
- Preheat oven to 350°F (175°C) and lightly grease three 12-count mini muffin pans.
- In a large bowl, mix devil’s food cake mix, eggs, and oil until just combined. Add black food coloring if desired.
- Scoop dough into mini muffin cups, leaving 1/4 inch space from the rim. Bake for 8–10 minutes.
- Immediately press the back of a 1-tablespoon measuring spoon into each warm cookie to form a cup. Let cool for 30 minutes.
- Beat butter in a medium bowl until creamy. Gradually add powdered sugar, then vanilla, salt, and milk. Add green food coloring.
- Pipe green frosting into each cooled cookie cup to create a bubbling potion effect.
- Top with sprinkles, candy eyeballs, and insert pretzel sticks. Get creative with the decoration!

