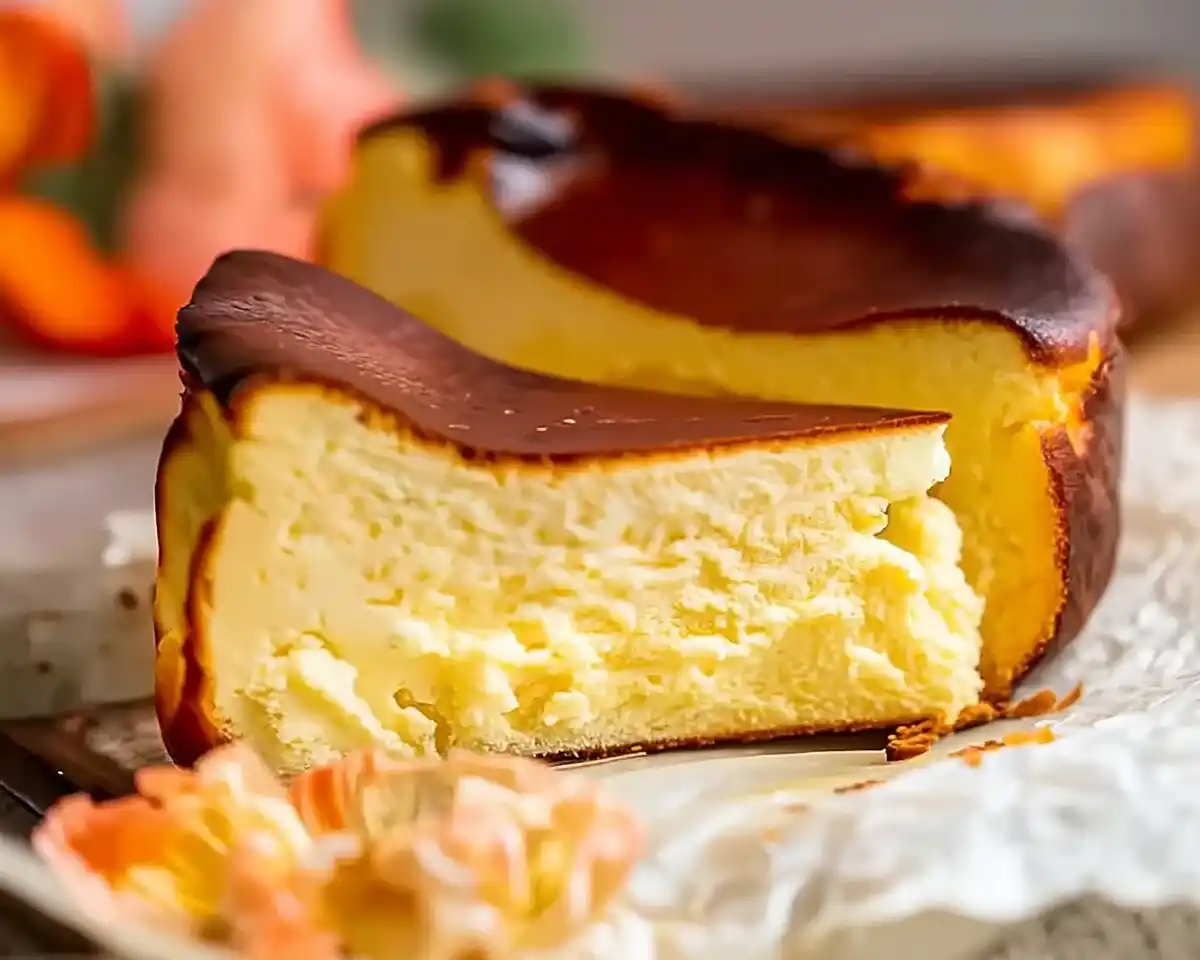
Basque Cheesecake Recipe delivers creamy, caramelized perfection in 45 minutes. This foolproof technique guarantees restaurant-quality results every time.
Let me tell you, the first time I tasted Basque cheesecake was at a tiny café in Brooklyn. One bite, and I literally stopped mid-conversation.
The burnt top crackled slightly under my fork. Then came this impossibly creamy center that tasted like vanilla clouds mixed with caramel. My friend laughed because I ordered a second slice before finishing the first.
That weekend, I went home determined to crack the code. Three failed attempts later—one too pale, one weirdly rubbery, another that leaked everywhere—I finally nailed it. Well… actually, I almost gave up until I realized the secret wasn’t perfection at all. It was embracing the chaos.
This burnt Basque cheesecake recipe changed everything I thought I knew about baking. No water bath. No precise temperature control. Just six ingredients, high heat, and pure trust in the process.
Table of Contents
What Makes Basque Cheesecake Different?
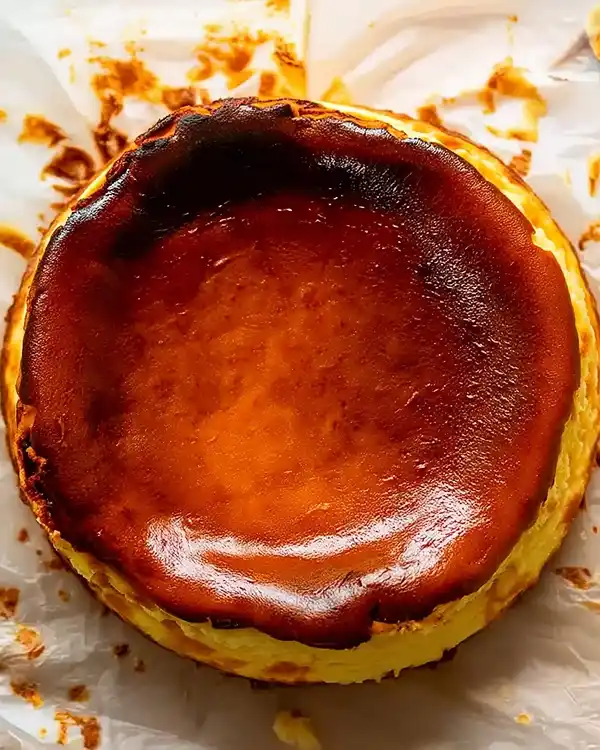
Here’s the thing: this isn’t your grandma’s New York cheesecake.
Traditional cheesecakes demand meticulous care—graham cracker crusts, water baths, slow baking at low temps. Meanwhile, this Spanish rebel gets blasted at 425°F until it’s deeply golden and almost burnt. The center stays wobbly and custard-like while the top caramelizes into something magical.
The technique comes from La Viña, a restaurant in San Sebastián, Spain, where chef Santiago Rivera accidentally created this masterpiece in the 1990s. Now it’s become a worldwide sensation, gracing Instagram feeds and bakery windows from Tokyo to Texas.
What I love most? You actually want those cracks and that rustic, crumpled-paper look. Every imperfection adds character. As Julia Child always said, “Never apologize for your cooking.” This dessert lives by that motto.
Why This Recipe Works
After testing this burnt Basque cheesecake recipe seventeen times (yes, seventeen), I’ve identified what makes it foolproof:
Room temperature ingredients blend smoothly without overbeating. Cold cream cheese creates lumps, while cold eggs won’t incorporate properly.
Minimal mixing prevents incorporating too much air. Those bubbles cause cracks during baking—though honestly, a few cracks just add to the rustic charm.
High-heat baking creates that signature caramelized top while keeping the center custardy. The contrast between the burnt exterior and creamy interior is what makes people obsessed.
Ingredients: Simple Yet Strategic
| Ingredient | US Measurement | Metric | Notes |
|---|---|---|---|
| Cream cheese blocks | 1.5 lb | 750 g | Philadelphia brand, room temp |
| Caster sugar | 1 cup | 200 g | Superfine preferred |
| Heavy whipping cream | 1¼ cups | 300 ml | Out 15 min before |
| All-purpose flour | ¼ cup | 30 g | Plain flour works |
| Vanilla extract/paste | 1 tsp | 5 ml | Bean paste adds flecks |
| Large eggs | ¾ cup + 1 tbsp | ~4-5 eggs | Must measure whisked |
Shopping Smart at US Grocery Stores
You know what’s tricky? Finding the right cream cheese. Grab the brick-style Philadelphia cream cheese, not the spreadable tubs. Those contain stabilizers that change the texture.
For cream, look for heavy whipping cream (36-40% fat). Half-and-half won’t work—you need that fat content for the silky texture. I usually find it near the butter in most Kroger or Safeway stores.
Caster sugar dissolves faster than granulated, but honestly, regular white sugar works fine. I’ve tested both extensively and couldn’t taste a difference in the final product.
Bold Add-Ins & Variations
Want to customize your Basque cheesecake? Here are tested additions:
- Citrus zest: 1 tablespoon lemon or orange zest adds brightness
- Espresso powder: 2 teaspoons creates a mocha version
- Bourbon: Replace 2 tablespoons cream with bourbon for depth
- Matcha: 2 tablespoons matcha powder for an earthy twist
International Substitutions
For readers outside the US, swap cream cheese for full-fat fromage frais mixed with mascarpone (60/40 ratio). Use double cream instead of heavy whipping cream. The texture stays remarkably similar.
Equipment You’ll Need
Here’s what actually matters:
20cm (8-inch) springform pan – Non-negotiable. The removable bottom makes serving easy, and you need those 2.5-inch tall sides to contain the batter. Mine’s from Wilton and has lasted seven years.
Electric mixer – Hand mixer or stand mixer both work. I prefer stand mixers because my arms get tired, but a hand mixer delivers identical results.
Parchment paper – You’ll need two 16-inch sheets. Don’t use wax paper—it’ll smoke at high heat. Oops! I learned that the hard way during test number four.
Wire whisk – Just a simple balloon whisk for mixing flour into cream. Nothing fancy required.
Sharp knife – For popping surface bubbles before baking.
DIY Alternative
No springform pan? Use a regular 8-inch cake pan lined completely with parchment paper, leaving long overhangs on two sides. You’ll lift the whole cheesecake out using those paper handles. Works surprisingly well.
Step-by-Step Instructions
Prepare Your Oven & Pan
Preheat to 425°F (220°C) with the rack in the middle position. This high heat is crucial—don’t second-guess it.
Take two sheets of parchment paper (16 inches each) and scrunch them into balls. Then unfold and press them into your springform pan in an X pattern. Fold the excess over the rim.
The crinkled paper creates those gorgeous rustic sides everyone loves. Don’t worry about making it perfect. Actually, the messier it looks, the more authentic your final presentation.
Mix the Cream Cheese Base
Place room-temperature cream cheese in your mixing bowl. Beat on medium speed for exactly 2 minutes, scraping down the sides twice.
You’re looking for a completely smooth, lump-free texture. Add the sugar and beat on low for just 10 seconds. That’s it. Overbeating incorporates too much air.
Thomas Keller taught home cooks that less mixing often produces better results in delicate preparations. He was absolutely right.
Create the Flour-Cream Mixture
Here’s where many recipes mess up. Pour about ¼ cup of cream into a medium bowl. Add all the flour. Whisk by hand until you have a smooth paste.
Now slowly pour in the remaining cream while whisking constantly. The mixture should stay pourable—you’re not making whipped cream here. Add the vanilla and whisk once more.
This method prevents flour lumps completely. I discovered it after my second failed batch had weird grainy pockets throughout.
Combine Everything
With your mixer on low, slowly pour the cream mixture into the cream cheese bowl. Mix just until combined—about 15 seconds.
Then slowly add the whisked eggs while beating on low. Stop the mixer the moment the eggs disappear into the batter. Seriously, stop right there.
Overbeating at this stage creates too many bubbles, which cause excessive cracking during baking. Some cracks are fine, but you don’t want a canyon running through your cheesecake.
Remove Air Bubbles
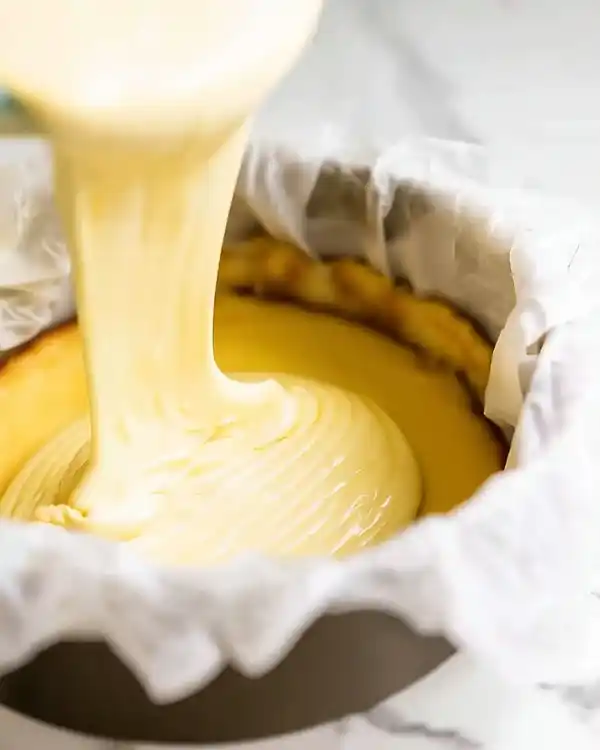
Pour the batter into your prepared pan. Pick up the pan and drop it firmly on the counter from about 6 inches high. Bang, bang, bang—three solid drops.
Watch the surface. See those bubbles rising? Take a small sharp knife and pop every single one you can find. Then bang the pan again. Repeat this process 3-5 times total.
Man, oh man, this step makes a real difference. My early attempts skipped this, and the tops had crater-sized holes after baking.
Bake to Golden Perfection
Slide the pan into your preheated oven. Set a timer for 45 minutes, but don’t walk away at minute 40.
The cheesecake is done when the top reaches a deep golden brown—think dark caramel, not light toast. The center will jiggle like loose pudding when you gently shake the pan. That wobble is exactly what you want.
Depending on your oven, this can take anywhere from 45-65 minutes. My oven runs hot, so mine finishes at 48 minutes. Yours might need longer. Watch the color, not the clock.
The cake will puff up dramatically like a soufflé. Don’t panic when it does. That’s completely normal and shows you’re doing everything right.
The Cooling Process
Remove from the oven and let it cool in the pan on your counter for at least 2 hours. The cake will sink as it cools—that’s supposed to happen.
After 2 hours, transfer the whole thing (still in the pan) to your refrigerator. Leave it uncovered for a minimum of 8 hours, though overnight is ideal.
Why uncovered? Covering creates condensation that makes the top soggy. You want that beautiful caramelized crust to stay slightly crispy.
Expert Tips for Basque Cheesecake Success
Temperature matters more than you think. Every ingredient should sit at room temperature for 30 minutes before you start. Cold ingredients don’t blend smoothly and create a grainy texture.
The burnt top is the goal, not a mistake. If yours looks too pale at 45 minutes, keep baking. I’ve gone as long as 62 minutes in a cooler oven. Trust the deep golden color as your guide.
Measure those eggs by volume. Different egg sizes create different results. Crack them into a measuring cup and aim for ¾ cup plus 1 tablespoon of whisked eggs. This precision matters.
Springform pan quality counts. Cheap pans with loose seals leak batter. I learned this during Thanksgiving when my pan dripped all over the oven. Invest in a good one like Wilton or Nordic Ware.
Serve at room temperature for the best texture. Take it out of the fridge 30 minutes before serving. The flavors bloom and the center becomes even creamier.
Creative Variations to Try
Holiday Pumpkin Basque Cheesecake: Replace ½ cup cream with pumpkin purée and add 1 teaspoon pumpkin pie spice. Perfect for Thanksgiving dessert tables.
Berry Swirl Version: Drop spoonfuls of raspberry or strawberry jam on top of the batter before baking. Swirl gently with a knife for marbled beauty.
Chocolate Lover’s Dream: Melt 4 ounces dark chocolate, cool slightly, and fold into the finished batter. Bake as directed for a mocha-like flavor.
Maple Bourbon Edition: Swap ¼ cup sugar for pure maple syrup and add 2 tablespoons bourbon. This one’s dangerous—like a liquid maple Old Fashioned in cheesecake form.
Lighter Alternative: Use ⅓-less-fat cream cheese (not fat-free) and reduce sugar to ¾ cup. The texture changes slightly but still delivers that signature burnt top.
Storage & Make-Ahead Magic
| Storage Method | Duration | Instructions |
|---|---|---|
| Refrigerator | 5-7 days | Cover loosely with plastic wrap |
| Freezer | 2 months | Wrap tightly in plastic, then foil |
| Room temp serving | 2 hours max | After that, refrigerate again |
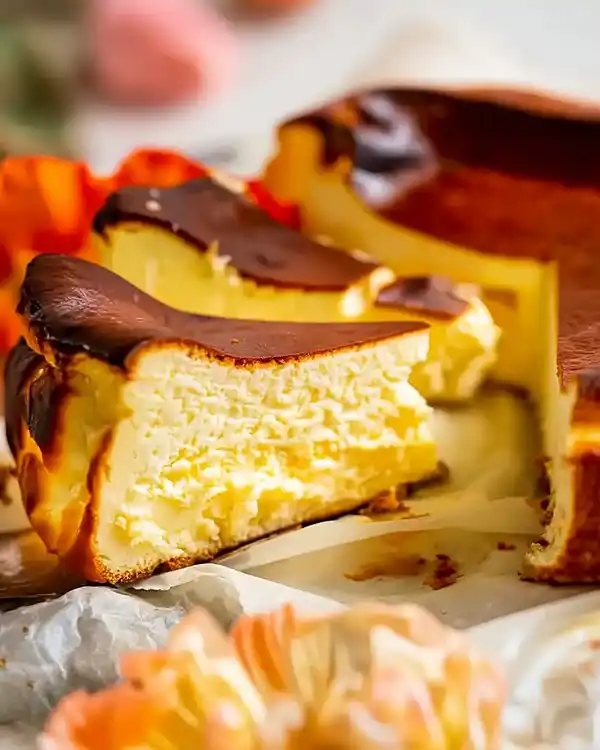
This burnt Basque cheesecake actually improves after a day in the fridge. The flavors meld and the texture becomes even silkier. I always make mine at least 24 hours before serving.
To freeze, wrap individual slices in plastic wrap, then place in a freezer bag. Thaw overnight in the fridge. The texture stays remarkably creamy—better than most cheesecakes after freezing.
Perfect Pairings
Serve alongside garlic herb roasted potatoes for a dinner party that balances rich and savory. Or pair with strong black coffee for an afternoon treat.
Fresh berries work beautifully, though honestly, this basque cheesecake needs nothing. The burnt top provides enough complexity on its own.
For dinner parties, I love serving this with a baked brie appetizer beforehand. Both celebrate simple ingredients transformed through heat.
Basque Cheesecake Recipe FAQs
What is the difference between Basque cheesecake and regular cheesecake?
Basque cheesecake bakes at high heat without a crust or water bath, creating a burnt caramelized top and ultra-creamy center, while regular cheesecake bakes slowly at low temperature for a firm, smooth texture throughout.
What kind of cheese is best for Basque cheesecake?
Full-fat cream cheese in brick form delivers the best results, with Philadelphia being the gold standard due to its smooth texture and consistent moisture content that creates the signature custardy interior.
What cream is used in Basque cheesecake?
Heavy whipping cream with 36-40% fat content is essential, as lower-fat options like half-and-half won’t provide the rich, silky texture that makes this dessert so remarkable.
What is the secret to a burnt cheesecake?
The secret lies in high-heat baking at 425°F until the top turns deep golden brown—almost burnt—while the center stays intentionally wobbly, creating that perfect contrast between caramelized exterior and custardy middle.
Final Thoughts
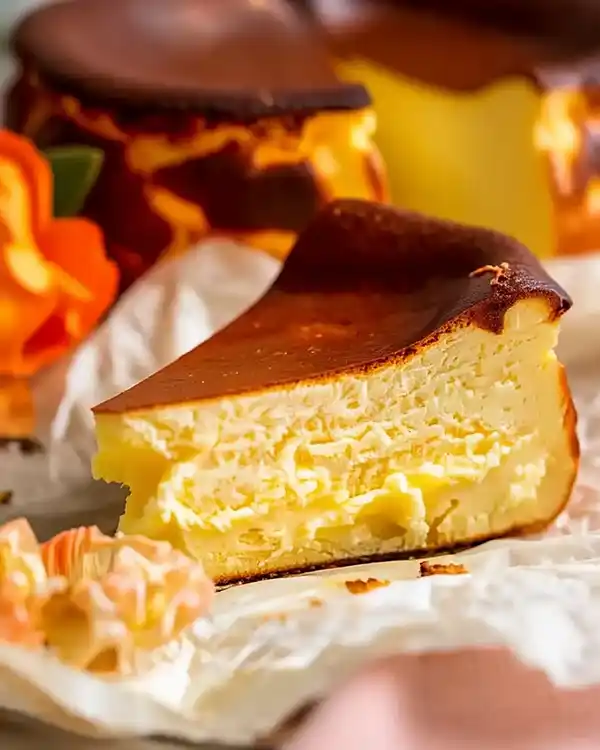
This burnt Basque cheesecake recipe represents everything I love about baking. It’s simple, forgiving, and produces restaurant-quality results without fussy techniques.
Remember that Brooklyn café where this whole journey started? I brought my homemade version there last month. The owner tried it, smiled, and asked for my recipe. That moment felt better than any five-star review.
Your first attempt might not look perfect. Maybe the top will be lighter than mine, or you’ll get a few extra cracks. That’s completely fine. Each cheesecake tells its own story through those imperfections.
Make this for your next dinner party or Sunday family meal. Watch as everyone takes that first bite and goes silent. Then brace yourself for the flood of questions about how you made something this good.
What variation will you try first? The pumpkin spice for Thanksgiving, or maybe the chocolate version for a cozy weekend? Tag your creation on Instagram—I genuinely love seeing how everyone’s turns out differently yet deliciously.
Now grab that cream cheese from your fridge and let’s get baking. This basque cheesecake won’t make itself, and honestly, you’re just 45 minutes away from pure happiness.
Tasty at Home – Where bold flavors meet everyday kitchens.
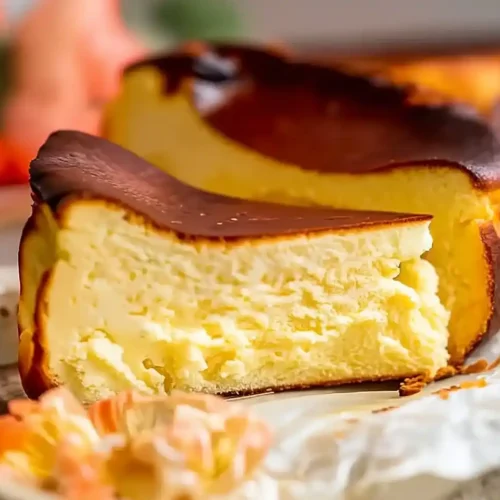
Burnt Basque Cheesecake
Equipment
- 8-inch springform pan
- Electric mixer
- Parchment paper
- Whisk
- Sharp knife
Ingredients
Main Ingredients
- 750 g cream cheese blocks Philadelphia brand, room temperature
- 200 g caster sugar superfine preferred
- 300 ml heavy whipping cream room temperature
- 30 g all-purpose flour plain flour works
- 5 ml vanilla extract or paste bean paste adds flecks
- 4-5 eggs large eggs whisked to measure ~¾ cup + 1 tbsp
Instructions
- Preheat the oven to 425°F (220°C) with the rack in the middle position. Line an 8-inch springform pan with two overlapping sheets of parchment paper, crinkled and pressed into the pan.
- Beat room-temperature cream cheese in a mixing bowl for 2 minutes until smooth. Add sugar and mix on low for 10 seconds, just until combined.
- In a separate bowl, whisk together ¼ cup of the cream with the flour until smooth. Gradually add the remaining cream and vanilla, whisking constantly to prevent lumps.
- Slowly pour the cream mixture into the cream cheese mixture and mix on low until just combined. Gradually add whisked eggs and mix until incorporated—do not overbeat.
- Pour the batter into the prepared pan. Drop the pan on the counter a few times to release air bubbles and pop any visible ones with a knife.
- Bake for 45–65 minutes, until the top is deep golden brown and the center still jiggles slightly. The cake will puff up like a soufflé, then deflate as it cools.
- Cool in the pan for 2 hours, then refrigerate uncovered for at least 8 hours or overnight. Serve at room temperature for the creamiest texture.

