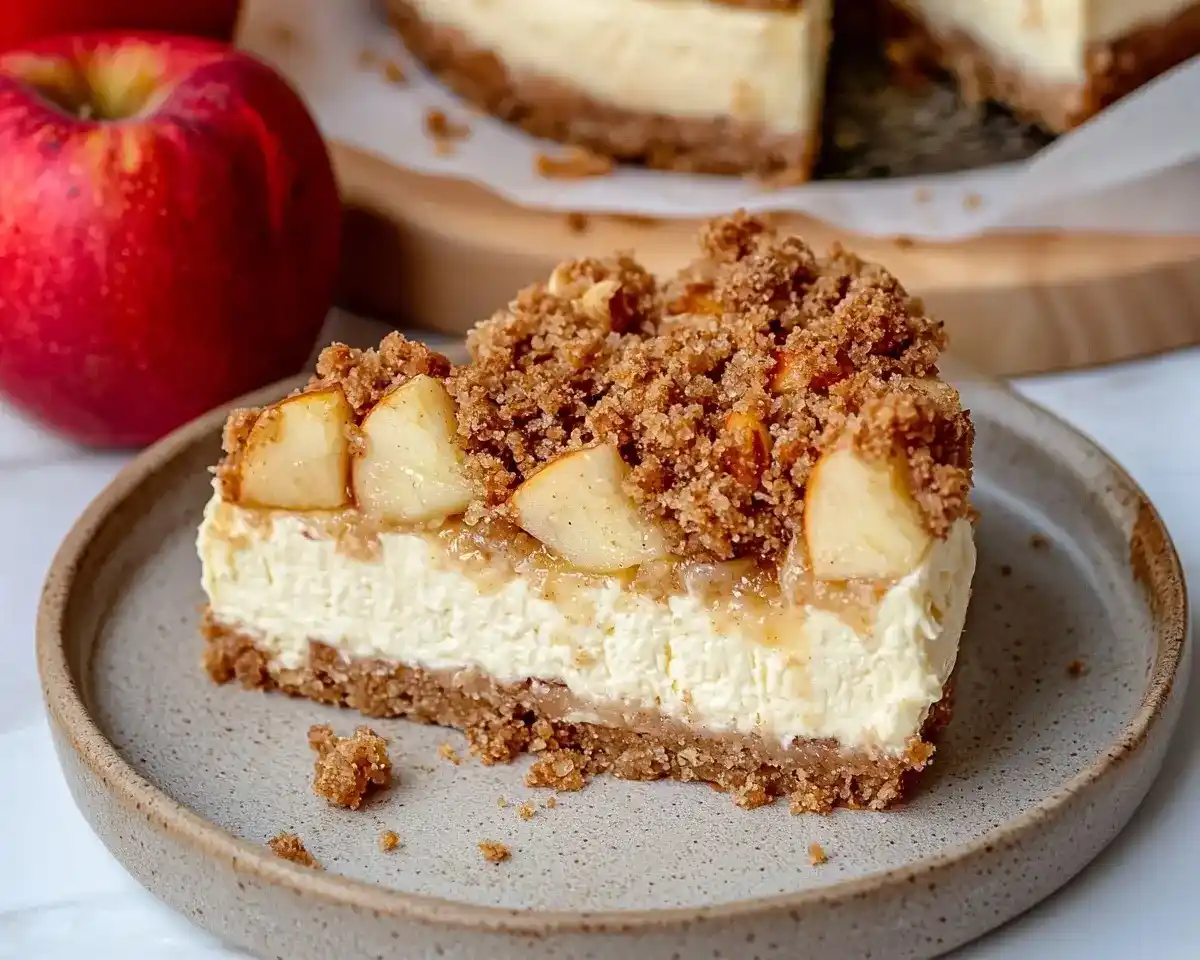
Apple Cheesecake Crumble combines creamy cheesecake with spiced apples and buttery crumble. Master this show-stopping dessert with our tested recipe.
Hi, I’m Linda, and welcome to Tasty at Home—a cozy corner where bold flavors meet everyday kitchens. Last October, I accidentally dropped my grandmother’s apple pie on the kitchen floor right before Thanksgiving dinner.
Well… that’s when desperation turned into destiny. I grabbed the cheesecake I’d made for backup and wondered: what if I combined both desserts? After twelve attempts—including one spectacular crumble-avalanche moment—I finally nailed this Apple Crumble Cheesecake.
This dessert changed everything. Moreover, it solved my eternal dilemma of choosing between apple pie and cheesecake at holiday gatherings.
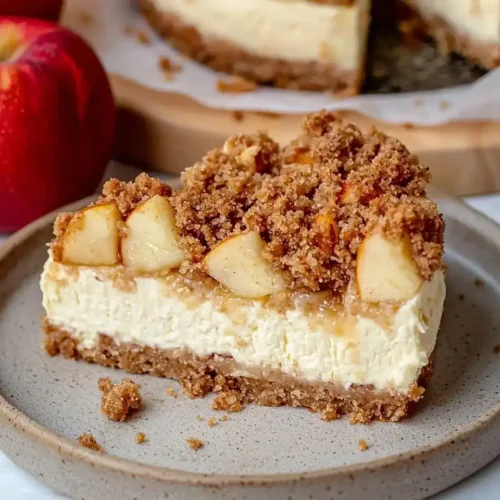
The magic happens when creamy cheesecake meets cinnamon-spiced apples and a buttery crumble topping. Therefore, you get three incredible textures in one bite: smooth, tender, and crispy. Let me tell you… this recipe became my most-requested dessert within weeks.
Whether you’re planning your Thanksgiving menu or simply craving something extraordinary, this Apple Pie Crumble Cheesecake delivers. Plus, I’ve tested every shortcut and troubleshooting trick so you can succeed on your first try.
Tasty at Home – Where bold flavors meet everyday kitchens.
Table of Contents
What Makes This Apple Crumble Cheesecake Special
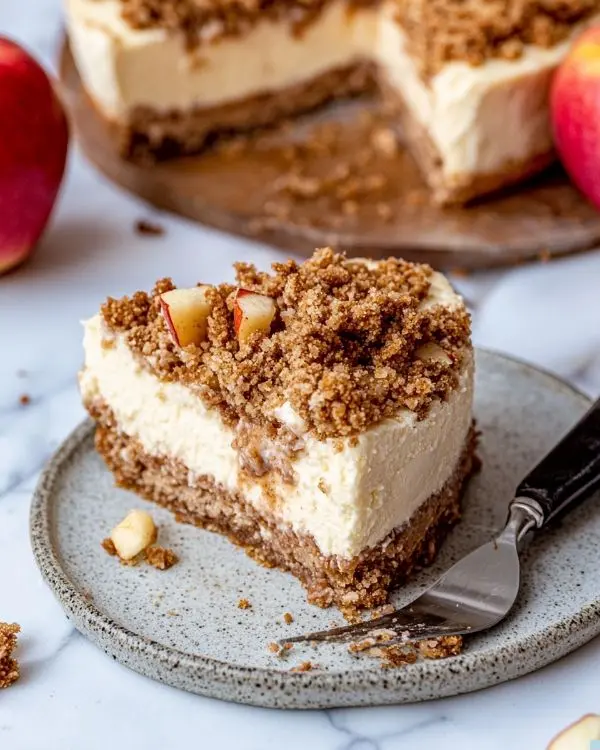
This recipe stands apart because it uses a water bath method that prevents cracks. Additionally, the spiced cookie crust adds depth that regular graham cracker bases can’t match.
I’ve incorporated techniques from Thomas Keller’s precise temperature control methods. Consequently, your cheesecake will have that signature creamy texture without any graininess.
The apple layer gets tossed in cinnamon sugar ahead of time. This step draws out excess moisture, preventing a soggy middle. Furthermore, the crumble topping stays crispy even after refrigeration.
Ingredients You’ll Need
Here’s everything broken down for easy shopping at your local grocery store:
| Component | Ingredient | US Measure | Metric | Notes |
|---|---|---|---|---|
| Cookie Crust | Digestive or graham crackers | 7 oz | 200 g | Honey grahams work beautifully |
| Ground nutmeg | ½ tsp | ½ tsp | Fresh-grated is exceptional | |
| Ground cinnamon | 1½ tsp | 1½ tsp | Use Ceylon for smoother flavor | |
| Dark brown sugar | 1½ tbsp | 1½ tbsp | Light brown works too | |
| Butter, melted | 3½ tbsp | 50 g | Unsalted preferred | |
| Apple Filling | Apples, diced small | 1 cup | 150 g | Granny Smith or Honeycrisp |
| Granulated sugar | 1 tbsp | 1 tbsp | Draws out moisture | |
| Ground cinnamon | 1 tsp | 1 tsp | Balances tartness | |
| Crumble Topping | All-purpose flour | ¾ cup | 100 g | Creates perfect texture |
| Dark brown sugar | ⅓ cup + 1 tbsp | 80 g | Adds molasses notes | |
| Butter, room temp | 5 tbsp | 70 g | Must be soft | |
| Cheesecake | Cream cheese, full fat | 21 oz | 600 g | Philadelphia brand is reliable |
| Granulated sugar | 1 cup | 200 g | Don’t reduce amount | |
| Sour cream (14-18%) | ⅔ cup | 150 g | Room temperature essential | |
| Cornstarch | 1 tbsp | 1 tbsp | Prevents weeping | |
| Vanilla extract | 2 tsp | 2 tsp | Pure, not imitation | |
| Large eggs | 3 | 3 | Room temperature crucial |
Shopping Tips for Best Results
Visit your local grocery store’s baking aisle for high-quality vanilla extract. Meanwhile, check the dairy section for Philadelphia cream cheese—it truly makes a difference in texture.
For apples, choose firm varieties like Granny Smith or Honeycrisp. These hold their shape during baking and provide the right tartness. Oops! I once used Red Delicious and ended up with apple mush.
Bold Add-ins & Variations:
- Caramel sauce drizzle for extra decadence
- Chopped pecans in the crumble for nutty depth
- Maple syrup instead of sugar in apples (Julie Marie Eats Apple Crumble Cheesecake style)
- Ginger snap cookies for a spicier crust
Ingredient Quality Indicators
Select cream cheese blocks without any separation visible through the foil. Additionally, press the package gently—it should feel uniformly firm.
For butter, European-style varieties with higher fat content create richer results. However, regular unsalted butter works perfectly fine.
Choose apples that feel heavy for their size and have no soft spots. Furthermore, they should make a crisp sound when tapped.
Essential Equipment and Preparation
You’ll need a 9-inch (22 cm) springform pan for this recipe. Additionally, grab a food processor for the crust and a roasting pan for the water bath.
Equipment List:
- 9-inch springform pan
- Food processor or sturdy zip-lock bag with rolling pin
- Electric hand mixer or stand mixer
- Medium mixing bowls (3)
- 10-inch cake pan (for double-pan method)
- Large roasting pan
- Parchment paper
- Aluminum foil
- Cooling rack
DIY Alternative: Don’t have a food processor? Place cookies in a heavy-duty zip-lock bag and crush them with a rolling pin. It takes a few extra minutes but works great.
Step-by-Step Instructions
Building the Spiced Cookie Crust
Preheat your oven to 325°F (160°C) using conventional settings. This temperature ensures even baking without burning the edges.
Add graham crackers, brown sugar, cinnamon, and nutmeg to your food processor. Pulse until the mixture resembles fine sand—about 30 seconds. Then, melt the butter in your microwave for 20 seconds.
Pour melted butter into the processor and pulse again. The mixture should hold together when squeezed. Therefore, if it’s too dry, add another tablespoon of melted butter.
Line your springform pan bottom with parchment paper. Press the crust mixture firmly into the bottom using a flat glass. Furthermore, press it slightly up the sides—about half an inch high.
Bake for 10 minutes until it smells fragrant and toasty. Let it cool completely before adding the filling. Man, oh man… rushing this step creates a soggy bottom.
Preparing the Apple and Crumble Layers
Dice your apples into small cubes, about ¼-inch pieces. Toss them immediately with granulated sugar and cinnamon in a small bowl. Set aside while preparing the crumble.
The sugar will draw out apple juice as it sits. Consequently, you’ll drain this liquid before adding apples to prevent a watery cheesecake.
In another bowl, combine flour, brown sugar, and room-temperature butter. Use your fingers to rub the butter into the dry ingredients. You know… this hands-on method creates the best texture.
The mixture should form pea-sized clumps. Additionally, it should hold together when squeezed but still look crumbly. Set this aside while making your filling.
Creating the Perfect Cheesecake Batter
Ensure your cream cheese sits at room temperature for at least one hour. Cold cream cheese creates lumps that never fully disappear. Moreover, it requires overmixing, which incorporates too much air.
Beat cream cheese alone for one minute on low speed using a paddle attachment. Then, gradually add sugar in three additions. Scrape down the bowl sides between additions.
In a separate small bowl, whisk together sour cream and cornstarch until completely smooth. This step prevents lumpy spots in your finished cheesecake. Add this mixture to the cream cheese along with vanilla extract.
Mix on low speed until just combined. Then, add eggs one at a time, mixing only until each disappears. Overmixing eggs creates bubbles that turn into cracks later.
Julia Child always emphasized gentle handling at this stage. Therefore, resist the urge to beat vigorously.
Assembly and Water Bath Setup
Pour the smooth cheesecake batter into your cooled crust. Tap the pan gently on your counter twice to release air bubbles.
Drain the liquid from your sugared apples. Then, scatter apple pieces evenly across the cheesecake surface. Follow with the crumble topping, distributing it uniformly.
Now comes the crucial water bath setup. Boil water in your kettle while preparing the pans.
Place your springform pan inside a 10-inch cake pan. This creates a protective barrier against leaks. Then, set both pans inside your large roasting pan.
Pour hot water into the roasting pan until it reaches two-thirds up the outer cake pan’s side. This method keeps water away from your crust while providing even heat.
Alternative method: Wrap your springform pan in three layers of heavy-duty aluminum foil. However, water sometimes still seeps through, so I prefer the double-pan method.
Baking and Cooling Process
Bake at 325°F (160°C) for 1 hour and 20 to 30 minutes. The cheesecake is ready when the edges look set but the center still jiggles slightly when gently shaken.
Turn off your oven and crack the door open about four inches. Let the cheesecake cool inside for one full hour. This gradual temperature change prevents cracking from thermal shock.
After one hour, remove the cheesecake from the oven and water bath. Take off any aluminum foil and place it on a cooling rack. Let it reach room temperature completely—about another hour.
Once cool, refrigerate for at least six hours. Overnight chilling works best for clean slicing. Furthermore, the flavors meld beautifully during this time.
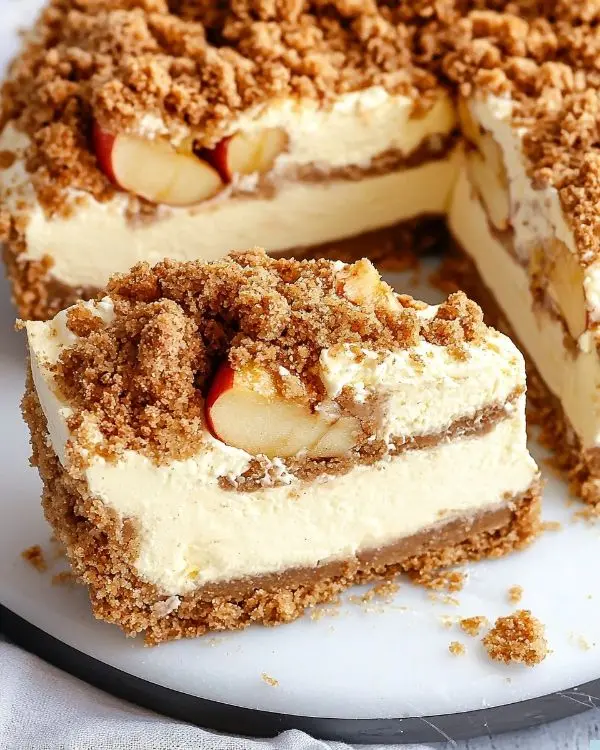
Expert Tips for Success
Always bring ingredients to room temperature before starting. Cold ingredients don’t blend smoothly and create texture issues. Additionally, they require longer mixing, which incorporates excess air.
Use a sharp knife dipped in hot water for clean slices. Wipe the blade between cuts for professional-looking pieces. Moreover, this technique works for any cheesecake.
Don’t open the oven door during the first hour of baking. Sudden temperature drops cause the cheesecake to sink or crack. Therefore, trust your timer and resist peeking.
The cornstarch in this recipe prevents “weeping,” that watery layer some cheesecakes develop. It’s a game-changer for make-ahead desserts.
Creative Variations to Try
Caramel Apple Version: Drizzle store-bought caramel sauce over each slice before serving. This addition transforms the dessert into something truly decadent.
Maple Pecan Twist: Replace brown sugar in the crumble with maple sugar. Add chopped pecans for extra crunch. This variation pairs beautifully with salted maple pecan pie bars for a dessert spread.
Holiday Cranberry Apple: Add dried cranberries to the apple mixture. The tartness cuts through the rich cheesecake perfectly for Thanksgiving.
Individual Servings: Make this recipe in a muffin tin lined with cupcake papers. Reduce baking time to 25-30 minutes. These work wonderfully for parties.
Gluten-Free Option: Substitute gluten-free graham crackers and use a gluten-free flour blend for the crumble. Everything else remains the same.
Storage and Make-Ahead Instructions
This Apple Cheesecake Crumble stays fresh in the refrigerator for up to five days. Cover it tightly with plastic wrap or store in an airtight container.
For freezing, wrap individual slices in plastic wrap, then aluminum foil. Freeze for up to three months. Thaw overnight in the refrigerator before serving.
| Storage Method | Duration | Best Practice |
|---|---|---|
| Refrigerator | 5 days | Cover tightly, away from strong odors |
| Freezer (whole) | 2 months | Wrap pan in plastic, then foil |
| Freezer (slices) | 3 months | Individual wrapping prevents freezer burn |
| Room temperature | 2 hours max | After that, refrigerate immediately |
Make-Ahead Strategy: Prepare the crust and crumble topping two days ahead. Store separately in airtight containers. Mix the filling and bake the day before serving.
Perfect Pairings and Serving Suggestions
Serve this dessert with freshly whipped cream or vanilla ice cream. Additionally, a drizzle of caramel sauce never disappoints.
For a complete fall menu, pair it with sweet apple cinnamon rolls for brunch. Alternatively, follow dinner with this cheesecake after serving Texas chocolate pecan pie.
Hot coffee or spiced apple cider makes an excellent beverage pairing. Furthermore, a dessert wine like late-harvest Riesling complements the apple flavors beautifully.
For a fun twist, try serving it alongside apple pie tacos at a dessert bar. Guests love having variety.
Apple Cheesecake Crumble FAQs
Why did my Apple Crumble Cheesecake crack?
Your cheesecake cracked because of rapid temperature changes or overmixing. Always cool gradually in the oven and mix on low speed only until ingredients combine.
Can I use a different type of apple for this recipe?
You can use any firm apple variety like Honeycrisp, Pink Lady, or Braeburn. Avoid soft apples like Red Delicious, which turn mushy during baking.
How do I know when my cheesecake is done baking?
Your cheesecake is done when the edges are set but the center still jiggles slightly like gelatin. It continues cooking during the cooling process, so don’t overbake.
Can I make Apple Pie Crumble Cheesecake without a water bath?
You can skip the water bath, but expect a drier texture and possible cracking. The water bath ensures even, gentle heat distribution for creamy results.
Final Thoughts: Your New Signature Dessert
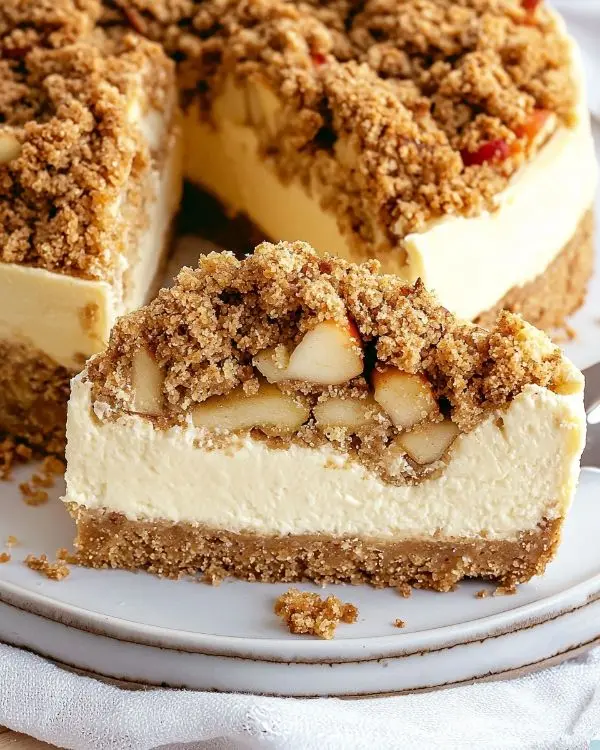
This Apple Crumble Cheesecake combines everything we love about fall desserts into one stunning creation. It captures the essence of apple pie while delivering the luxurious creaminess of cheesecake.
Remember that kitchen disaster I mentioned at the beginning? That dropped pie became my greatest baking breakthrough. Sometimes our best recipes come from happy accidents and creative problem-solving.
The combination of spiced crust, creamy filling, tender apples, and crispy crumble creates something extraordinary. Moreover, it’s surprisingly forgiving for home bakers who follow the steps carefully.
Make this dessert for Thanksgiving, holiday parties, or any occasion deserving something special. Your guests will ask for the recipe immediately. Furthermore, you’ll feel proud serving something this impressive.
Try pairing it with delicious pumpkin cupcakes for a complete fall dessert table. Alternatively, serve lemon brioche donuts for brunch and this cheesecake for dinner.
Don’t be intimidated by the steps. Take your time, follow the process, and trust the method. The water bath might seem fussy, but it guarantees success.
I’d love to see your Apple Crumble Cheesecake creations. Share them on social media and tag us at Tasty at Home. Tell me about your favorite variation or any creative twists you discovered.
Apple Crumble Cheesecake
Equipment
- 9-inch springform pan
- Food processor
- Electric mixer
- mixing bowls
- Roasting pan
- Parchment paper
- aluminum foil
- Cooling rack
Ingredients
Cookie Crust
- 200 g Digestive or graham crackers Honey grahams work beautifully
- 0.5 tsp Ground nutmeg Fresh-grated is exceptional
- 1.5 tsp Ground cinnamon Use Ceylon for smoother flavor
- 1.5 tbsp Dark brown sugar Light brown works too
- 50 g Butter, melted Unsalted preferred
Apple Filling
- 150 g Apples, diced small Granny Smith or Honeycrisp
- 1 tbsp Granulated sugar Draws out moisture
- 1 tsp Ground cinnamon Balances tartness
Crumble Topping
- 100 g All-purpose flour Creates perfect texture
- 80 g Dark brown sugar Adds molasses notes
- 70 g Butter, room temp Must be soft
Cheesecake
- 600 g Cream cheese, full fat Philadelphia brand is reliable
- 200 g Granulated sugar Don’t reduce amount
- 150 g Sour cream (14-18%) Room temperature essential
- 1 tbsp Cornstarch Prevents weeping
- 2 tsp Vanilla extract Pure, not imitation
- 3 Large eggs Room temperature crucial
Instructions
- Preheat oven to 325°F (160°C). Line the bottom of a 9-inch springform pan with parchment paper.
- Pulse graham crackers, brown sugar, cinnamon, and nutmeg in a food processor until fine. Add melted butter and pulse until mixture holds together. Press into pan bottom and bake 10 minutes. Cool completely.
- Toss diced apples with sugar and cinnamon. Let sit to draw out moisture, then drain before using.
- Combine flour, brown sugar, and butter with fingers until crumbly. Set aside.
- Beat cream cheese on low speed until smooth. Gradually add sugar. Mix sour cream and cornstarch separately, then add with vanilla. Mix in eggs one at a time, just until combined.
- Pour cheesecake batter into cooled crust. Top with drained apples and crumble.
- Set pan inside a 10-inch cake pan, then place both in a roasting pan. Pour hot water halfway up the sides. Bake 1 hour 20–30 minutes until edges are set and center slightly jiggles.
- Cool cheesecake in oven with door cracked for 1 hour, then on a rack for another hour. Chill at least 6 hours or overnight before serving.

